Saturday, 8 February 2020

ICOM IC-7610

ICOM 7610  vs  Yaesu 101


I was thinking of buying a new 101, but decided to pull back on the reigns and invest a bit of time in making a proper evaluation of the radio, comparing it as objectively as possible with the competition. I don't mean comparing all the "tech" stuff and the "laboratory" results - all radios at this level are pretty astonishing anyway - I'm talking about the everyday "living with a radio" stuff! I wanted to look at the features and the ergonomics as much as anything else.

So I spent a good few days looking at videos and written reviews of both machines and even some head-to-heads. I was pulled left and right, swinging from one radio to another - and then back again!

I KNOW, I KNOW I'd be better off spending the money on a super antenna system and keep the radio I have, but I have no chance of doing that where I live, so I'm gonna go for the best (and most fun) receiver that I can afford and carry on experimenting with wire antennas. A local G4 (who's in a worse situation than me) is going to come over and help me make the most of my QTH.


Anyway, it soon became apparent that the 101's main competitor was the Icom IC-7610. I had also been looking at the Kenwood TS-890S, which is a superb bit of kit, but it only has one receiver and I really liked the idea of having two, so that pretty much ruled it out.

So it was 101 vs 7610.The Yaesu was the definite winner in the looks department, with its Superman bulk and bold styling. The VFO dial looks like it belongs on the front of a bank safe! There's also an attraction to the association with the classic old FT-101 boat anchor. But as much as I love the looks of the Yaesu, I had to put that to one side and focus on other things.


At this price level, I had to be sure that I was buying what I wanted and not what others thought was the best radio. Sure, I was eager to listen to people's opinions, but the final decision had to be mine.

The radios are virtually the same price, so that issue can be put to one side. The RX and TX qualities are virtually identical even though one is a full-blown SDR while the other (the 101) is a hybrid - a mix of superhet and SDR. Both have different approaches to noise reduction but both are equally wonderful at getting the job done.

I have an MFJ-993B ATU with interfaces which will work perfectly with either radio, so even that won't have any effect on my decision.

The way I finally decided on a radio was to focus on the things which stood out as Likes and Dislikes...


  • I hate the 101's chavvy 3D waterfall!
  • I dislike the 101's 2D waterfall.
  • I love the 101's overall appearance.
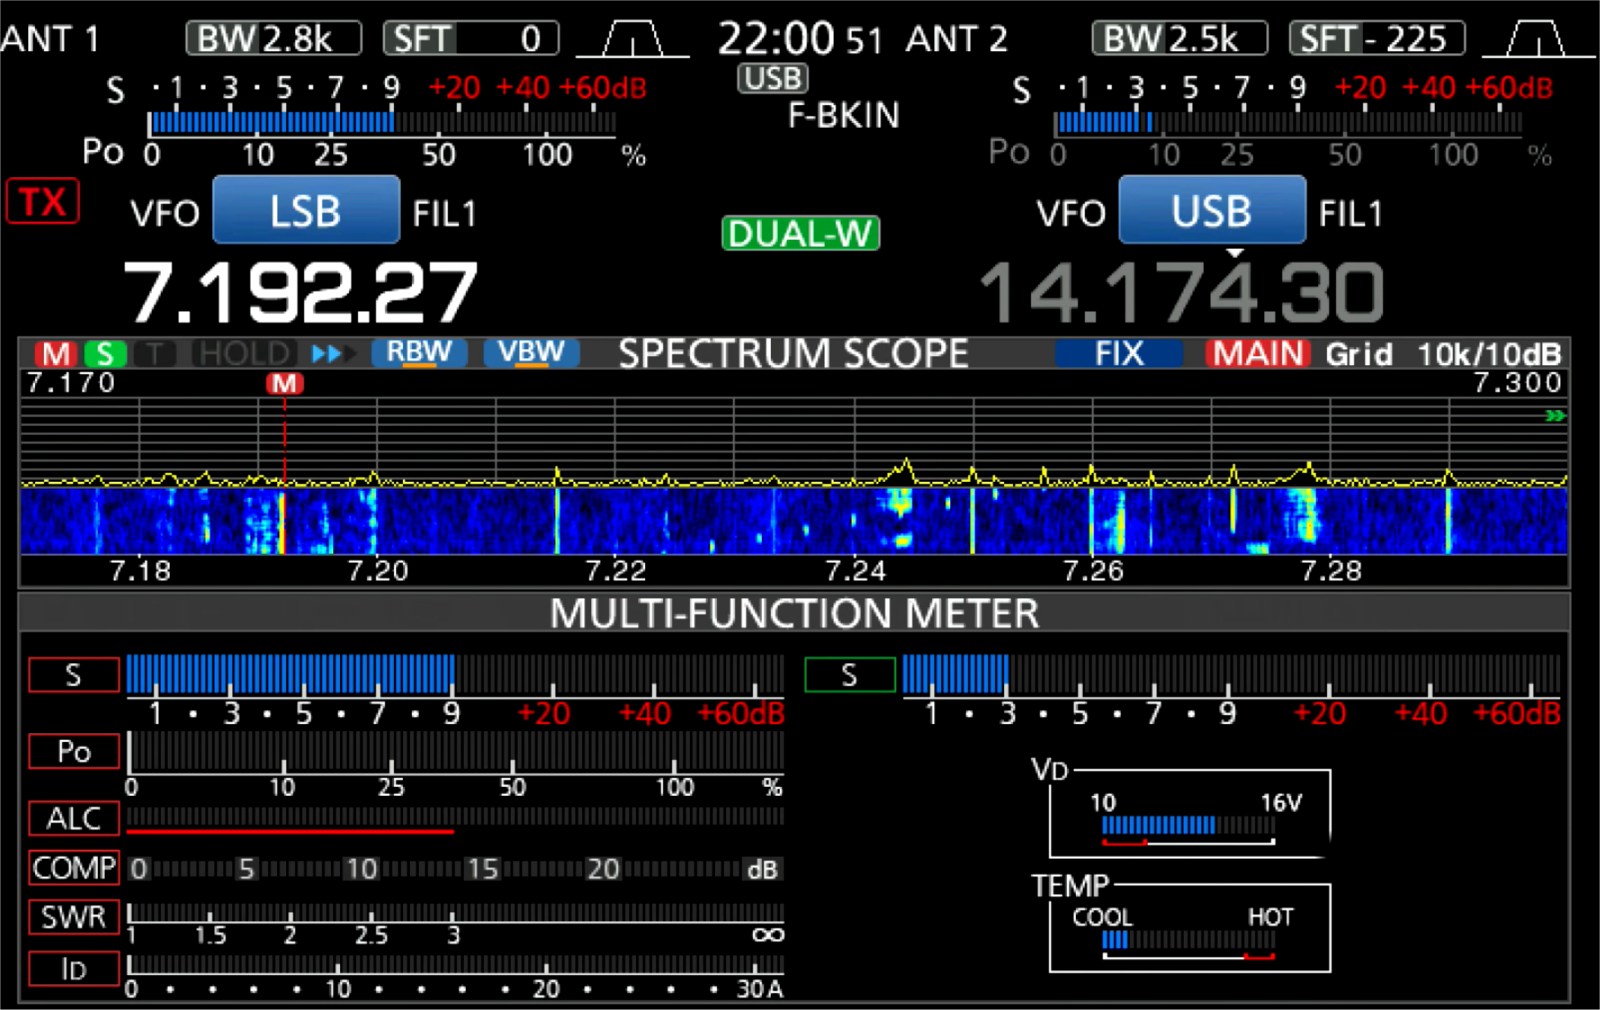
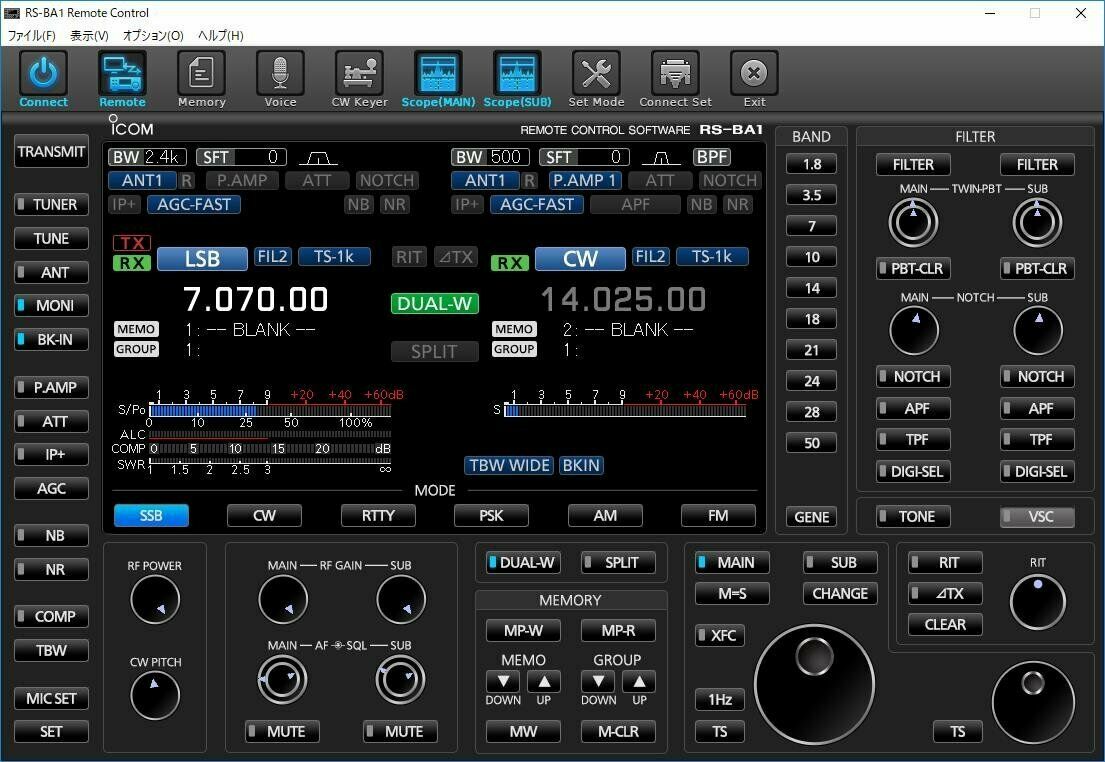
  • I love the 7610's progressive tuning.
  • I like the 7610's meter options.
  • I like the 7610's screen layout options.
  • I like the 101's 3 antenna ports.
  • I love the 7610's built-in network server.
  • I love the 7610's  4 USB ports.
  • I love the 7610's Remote Control capability.
  • I love the 7610's QSO recorder.
  • I like the 7610's compact dimensions.
     
After evaluating it all, I knew I'd find it much easier to live with the Icom. When it came to buying, I chose ML&S where they were selling the radio for £3,000. I also wanted the £200 SM-50 base mic - apparently it gets fantastic audio reports with this radio. 


Look how the 7610 deals with adjacent signals. This video shows a CW signal, which is then overlaid with a stronger signal which is then moved to the side to see how far away it has to be from the original signal in order for the CW to be heard again. The comparison is between the 7600 and the 7610...


Wow!


This radio is a stunning piece of technology which is incredibly intuitive and easy to get great results. 
The CW operator will adore the 7610 and so too will competition operators. Unless you want to fork out £5k or more, this is quite simply one of the best out there!

UPDATE : I did end up buying a Yaesu FT-DX101D but quickly sold it. I remain in love with the 7610 :-)


--- * ---


Thanks for visiting - please take a minute to leave a comment below 

73, Tom, M7MCQ.

Wednesday, 5 February 2020

WANT TO BE A HAM?

If you live in the Greater Manchester area and have always fancied being an Amateur Radio Operator, then watch this video and get in touch!

EXPAND TO FULL SCREEN

Sunday, 26 January 2020

LEARNING TO PAINT

I DO OTHER STUFF AS WELL AS RADIO

I have a few hobbies and one of them is learning to paint - traditionally and digitally. Here's my BLOG...


TWO BRILLIANT BLOGS!!


K5RV.com

Today I came across a really good BLOG. Unlike most blogs, this one has something for everyone - you just keep going from one subject to another - time flies by as you read and learn. Howard writes in a very relaxed, easy to read manner, but also with technical authority and a great depth of knowledge.

His blog is probably of particular interest to those who don't like to squander money on over-priced 'off-the-shelf' solutions when there's a cheaper solution out there from which you can also learn something new.

HIGHLY RECOMMENDED!


PE4BAS

Another fabulous source of ham-related information can be found on Bas's BLOG and like the other one, there's a very wide range of subjects covered. Give it a visit and subscribe so that you don't miss anything.


HIGHLY RECOMMENDED!


Friday, 24 January 2020

QUICK-RELEASE EARTH

Might seem daft, but I've fitted these ground connections to all my radios cos I'm sick of struggling with the Ground connection when trying to pull a radio out from it's position on a shelf, when all the other connections can be undone quickly :-) 


NISSEI DG-503

SWR / POWER METER

Pretty much all radios have an SWR Meter built into them these day, but they're invariably small and not too easy to read. They can also only read one thing at a time usually (although there are exceptions to this like on my IC-7100), so it's not a bad idea to have one meter permanently in line showing Pwr, Ref & SWR while your radio(s) can be set to show ALC or whatever other measurement you opt for.

Looking on the market there are lots of choices out there, but I didn't want to spend a fortune, so I opted for a mid-upper range and ordered the NISSEI DG-503 which covers HF, VHF & UHF. All up to a couple of hundred Watts. Leaving it inline will lose you about 0.3db which is more than acceptable to me.
This SWR / Wattmeter Nissei DG-503 has a digital backlit display and allows the measurement of SWR for HF frequencies from 1.6 to 60 MHz and VHF-UHF from 125 to 525Mhz, as well as the measurement of the power up to 200W.
 
The SWR / Power Meter DG-503 can be used directly, with calibration.
Its low insertion loss allows it to be permanently connected.
Accuracy: +/- 5%
Antenna Connector: 2 * 2 UHF Female (SO-239)
Power supply: 12v with power cable included.

Tuesday, 21 January 2020

INTERFACE CABLE FOR FT-817 & ELAD DUO-ART

HOW TO MAKE AN INTERFACE CABLE

Well, since getting my ELAD DUO-ART I've done quite a bit of moaning about the fact that ELAD neither supply, offer to sell or provide a simple wiring diagram to allow you to interface your DUO-ART with your FT-817/818.

Seems absolutely crazy to me to advertise a feature which you can not help your customers to use.  The DUO-ART manual shows an over-simplified diagram of how to connect an FT-817 to your amp, but there is no information on how that connection is made. When I asked Advanced Operators for help, I typically got the response "It's not rocket science" and "It looks pretty straightforward", but no one actually came out with anything useful.

I approached ELAD's Technical Support and despite me explaining that I am a Foundation Licence holder with ZERO KNOWLEDGE of electronics, I received techno-talk and unfathomable schematics. They could not provide a pre-made cable and could not just tell me in plain English which parts to buy and which wires go to which pins. In fact, they sent me conflicting information on a number of occasions. Here's some of the stuff they sent to me which really did not help...


I turned to the ELAD FORUMS and initially got the familiar responses which make you feel a bit dumb and spoke of 'holding the soldering iron the right way around'. I explained that I wasn't dumb - and I was perfectly capable of putting together a cable if someone could just tell me what connects to what.

After a couple of days, I was again receiving conflicting advice (albeit in a much more friendly manner). So I decided to read through the information, pick the bones out of it and just 'have a go'!

______________________________


So for the benefit of other DUO-ART/FT-817/818 owners, here's what I did....

First of all, you need to buy 3.5mm Stereo Jack-Plug with shielded cable. You may already have one knocking about somewhere - just make sure it's of decent quality and definitely shielded.

You also need to buy a a Yaesu CT-62 Lead. At one end it has an 8-PIN DIN for the 817's ACC Socket and at the other end it has a DB9 Connector for the DUO-ART.  You NEED the DB9 Connector, but the lead is useless in this project because it only contains 4 wires, so open up the DB-9 connector, take a nice clear photo of the wiring for reference and then de-solder the connections and throw the rest of the cable in a storage drawer.

JUST A QUICK NOTE : Don't think that you can use any old DB-9 connector! The CT-62's DB-9 connector includes a PCB which provides some sort of "Line Level". 

Order a shielded 8-PIN MINI DIN to Bare Wire Lead from the internet. The best place to buy one in the UK is TechnoFix...


Using a Multi-Meter, determine which colours go to which pins and make a note. Your cable may have the same colour combination as mine, in which case you can follow the diagram above. Otherwise, just make sure that the 4 connections on the DB9 match up with the appropriate pins in the mini-din.

After soldering the 4 relevant wires to the DB-9, you will have four surplus wires in the cable. Find out which one of them goes to Pin-8 of the mini-din - you are going to connect that wire to the TIP of the Jack-Plug and cut off the 3 surplus wires.

When connecting the Jack-Plug Tip wire to the Pin-8 wire, it's best to keep both wires small. Lay the cables next to each other as show in the drawing below, cable-tie them together and connect the two wires together with a soldered joint. Insulate and then rebuild the DB-9 connector. You may want to add another cable-tie slightly lower down the cables for additional strengthening.


Your cable should now look like this.....


When it comes to testing, make sure that your FT-817/818 is set to its lowest power and set 5db attenuation on the DUO-ART. Try transmitting very briefly to make sure you've got the connections right and if all's okay, then you can increase the power levels.


I couldn't test the full power range of the amp because my licence only permits 10W, so I'll run more tests when my mate G0UXF pops over. So far though, it all seems to be running perfectly well. The ATU doesn't seem to do anything when I press TUNE so I'll see if there's a way to get that working with the FT-818 at a later date.

I'm just pleased that I managed to come up with a working solution when ELAD couldn't be bothered to. I'll probably use the FT-818 and DUO together once every blue moon, so I guess people will wonder why I was so determined to find an interface? Just because! The facility existed on the Amp and it drove me potty that no one seemed to know how to make a cable! If ELAD had just produced a simple guide like this one, everything would have been sooooo simple.

And even though he's a YorkshireMan, my thanks still go to Neil Smith G4DBN for his encouragement and assistance.

Elad duo-art interface cable for yaesu ft-817 ft-818