
YOU'VE NEVER USED IT??
I was roving around the many different Wires-X rooms the other night and during one of my QSO's, a guy asked how I was getting into the room. I told him that I was using Wires-X on my PC in Direct Mode. He told me he had never tried it and probably wouldn't even know how to set it up. He was using a repeater 55 miles away and was having to pump out 50W in order to reach it and it still wasn't perfect.

So with that in mind, I thought I'd write a small guide to setting it up from a beginners point of view. There's a million people out there who are technical wizards and could embarrass me with my extremely limited knowledge of Wires-X and the Fusion protocol, but what I can offer is a simple "get you going" approach.
All the information you need is already out there on Yaesu's website but personally, I found it to be really quite fragmented and sometimes a little frustrating, so this guide attempts to pull things together to try to make things easier for the outright beginner. If I have missed something important (or made errors) and someone notifies me, I will of course amend the post.
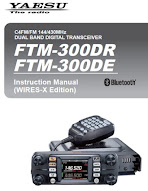
Throughout, I will use the FTM-500D as the example radio (because that's what I have), but I'll try to provide details for other modern C4FM rigs.
If you are able to comfortably reach a Repeater or Gateway, then you might not feel the need to switch to using Wires-X and that's fine. But what if your repeater goes offline? What if your local Gateway shuts down? Your radio will fall silent. So apart from having a good backup plan, using Wires-X will also broaden your overall understanding of what is going on in the background.
What I like most about Wires-X is that I can sit in the shack and see all the Fusion Rooms and Nodes around the world on a large PC screen. I can see how busy they are and jump from one to another simply by clicking on them.
When people are talking, I can clearly see their callsign and when I'm talking, I get to see the Countdown Timer, so I never time-out or cut my conversation short because I'm worried about timing out.
There are many other benefits too, so IMHO it's well worth learning more about it.
WHAT'S INVOLVED??
Well you should know from the get-go that you will need to buy an interface-lead! And that lead is not particularly cheap when purchased from a Yaesu supplier, but there's plenty of used ones around on eBay if you can't afford a new one. If you have an FTM400, you'll already have one!
Other than that, it's all very straightforward...
So the first thing to do is REGISTER on Yaesu's Wires-X website. It's easy to do and takes just a couple of minutes. Once you submit your email address, you'll receive an email back with an ID-REGISTRATION FORM. Click on the link.


PLEASE NOTE that you will need your radio's ID for the next step. This can be found inside the menu system of your radio. On the FTM500, it's in MENU-62. Make a note of your own Radio-ID.

You will next be taken to a webpage where you'll need to create a UserName and PassWord. Ideally, the username should not just be your callsign - make something up that's memorable (M7MCQFT991, M7MCQFT100, etc) and make a note of it along with whatever password you choose.
Then enter your CallSign and Radio-ID lower down, followed by all the other personal details asked for - name, address, contact number, etc.

At the bottom of the form, there's a CONFIRMATION button - click it, but be aware that you then need to wait for the pages to reload and then scroll down and click on the SEND button! So many people think they've finished after clicking on the confirmation button and sit there complaining that they've not heard from Yaesu (yes me lol).
You should quickly receive an email with the subject [WIRES-X web ENG] Your request has been accepted. A couple of working days later, Yaesu will send you a welcome email with the subject [WIRES-X Web] User Account Data Update Completed.
In that email you will see your WebMember User ID and Password, along with some other information which you will need (Node-ID & Room-ID).

PLEASE NOTE If you have more than one C4FM RADIO, you need to create a NEW MEMBER ID & PASSWORD for each radio. Eg, if you have say an FTM500 and an FT5D, you can’t use one log-in for both radios - register each one separately.
You can now install the Wires-X software and USB Driver from the Yaesu Website. At the time of writing, it's up to Version 1.55 (updated to include the new FTM500). After installation, I always restart the PC just to make sure everything has been registered properly.
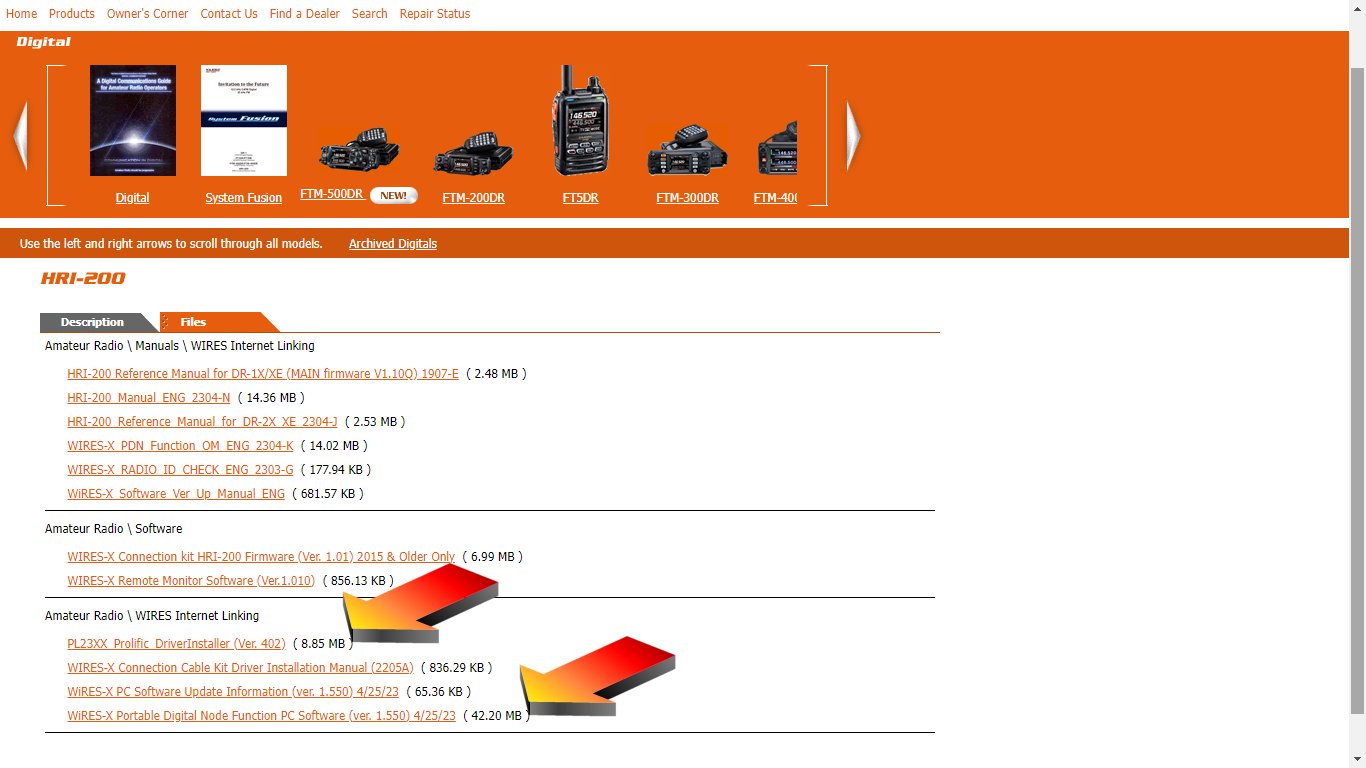
Next job is to make sure that your radio has the very latest firmware. You might not feel like doing this, but believe me, you're in for a world of pain if your firmware isn't current - especially if you have an older radio. Go to the Yaesu Website and download the relevant file for your radio.

The other part of the SCU cable (the Mic/Headphone) goes into your computer's audio sockets. You may or may not have to make some audio adjustments in Windows, but personally, I've never had to do it, so just forget that for now.

Now it's time to start up your radio. You need to place it in Wires-X Mode by holding down a couple of buttons before hitting the Power button. Each radio has it's own procedure for this, so refer to the image below to find out which buttons to press on yours. My FTM500 is highlighted in the image.

Once the radio has started, you should see onscreen that it's in Wires-X mode. Now you can run the Wires-X Software! The first time you run it, there will be a small setup procedure which is very simple. All you need to recall is your NODE-ID and ROOM-ID which you received by email.


then click ID-ENTRY


Once the windows are populated, you can scroll through all the rooms and even sort them by Name, Activity, City, Country, etc. When you find one that you think you'll use frequently (such as NWFG or CQ-UK), you can right-click and add to your favourites (BookMark).

Alternatively, go straight to CONNECT and join the room.
This will connect you to the chosen room and a new window will open showing you how many connections there are in that room. If someone is talking, you will hear them and see their information.
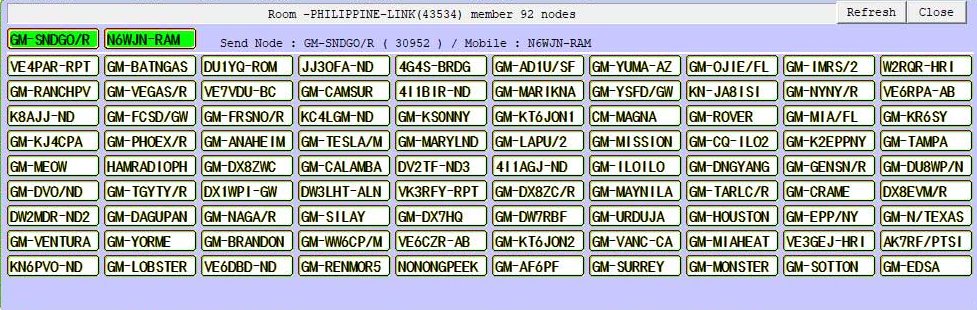
It could be that despite all these connections (see above) there's no one talking. Bear in mind that many of the callsigns on display will be repeaters, etc and not people. Just put a call out saying something like...
"This is Mike Seven Mike Charlie Quebec
listening for any calls"
If you get a response, bingo! If not, choose a different room by right-clicking on it and choosing CONNECT. Please note that you won't be able to connect to another room while someone is speaking in the current room.
Broadly speaking there are Digital Only Rooms, Analogue Only Rooms and Mixed Rooms. With the full SCU cable set attached, you should be able to communicate with them all, but if you only used the USB lead, you will be restricted to Digital Rooms only.
The images below should help explain the Wires-X icons....


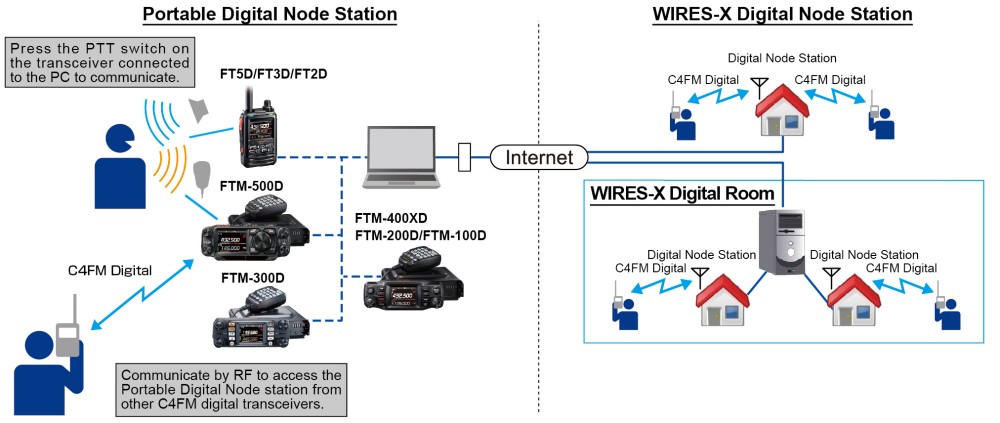
There are two ways to use Wires-X with your radio - DIRECT MODE and ACCESS MODE. You can switch between them by pressing a button on your radio. On the FTM500 you simply press


In DIRECT mode, you literally use the radio which is connected to your PC. Talk into the mic as you would normally. No RF will be transmitted - your transceiver is now virtually an Internet Radio. It works superbly and there are (as far as I know) very, very few faults or problems with it. I use this mode almost all the time.
In ACCESS mode, your radio becomes a Node which relays audio from Wires-X to a second radio - usually your handheld (eg FT3D). This way you can walk around your house with your handheld and communicate on Wires-X through your main radio connected to your PC. See the relevant Wires-X guides to learn more about this mode and how to set it up…


I use a Dummy Load on my main radio when in ACCESS mode so my transmissions aren't broadcast further than the perimeter of my property.
So that's about it for now. I hope that this post helps some people get to grips with the installation/setup procedure and gets you benefiting from Wires-X software. I strongly recommend that you watch the video below - it’s an hour long, but it’s well worth your time
If you find any errors or glaring omissions or wish to contribute to the post, please let me know.
73, Tom, M7MCQ
2 comments:
Great blog Tom. I have done several videos on this. For updating firmware..
https://youtu.be/1MaRrWs9WX4
For setting up a node
https://youtu.be/8G7ihF1sJa0
https://youtu.be/7TAFPQHabwA
I hope this helps :)
73 Ian
Thanks for those links Ian, I’m sure they’ll be of great help to people 👍👍👍
73, Tom, M7MCQ
Post a Comment