ROASTY TOASTY
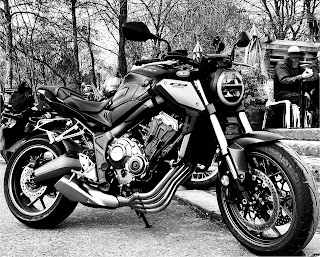
This weekend my wife was going out to see friends for the day so I thought I’d have a ride-out on the bike to North Wales. I’ve not been for ages and the weather was meant to be dry all day, so off I went. The first port of call was Conwy and Llangollen, before heading further south onto twistier roads. It was a great day, but it was FREEZING COLD!!!
All throughout the day I vowed to fit some heated grips as soon as I got home and so here we are, doing exactly that. I’ve recorded the job for the benefit of those who have never done anything like this before.
PLEASE BEAR IN MIND that the way I installed the grips is not necessarily the recommended way - it’s just the way that I did it. I’ve fitted heated grips many, many times before and found that on some bikes it’s a piece of cake and on others it’s quite awkward due to routing problems. I’d say this bike (2023 CBR650R) is somewhere in the middle.
First job is to lay out the kit and understand what you’ve got and where the various bits go. There’s basically a left-hand grip with a cable, a right-hand grip with a cable and a controller-cable which at one end connects the two grips and at the other end connects to the battery.
Note that the grip with a green cable marker is for the throttle side and the one with a yellow cable marker is for the brake side.
First job is to remove the bar-end weights. They’re held on with a Phillips screw but you’ll probably find that the weight just spins around as you try to undo it. If that’s the case, simply wrap some protective material around the weight and then use a tool to grip it gently while you use your screwdriver.
Once they’re off, you need to remove the existing grips by cutting a line down their length with a sharp blade. The left-hand grip is glued directly to the handlebar, but the right-hand grip is attached to a white plastic throttle tube.
You’ll find that the heated grip for the throttle will not push onto the white throttle tube, so you have to carry out some modification. Using a sharp blade, cut off the chamfered end of the tube and then shave off the protrusions which are all over the tube. When you’re done, you can do a test-fit to determine that you’ve removed enough material to allow the grip to slide onto the tube. It will still be a pretty tight fit (and that’s good) but you’ll want to use the supplied glue before fitting it for the final time.
With both grips fitted, you can re-attach the bar-ends but before you fit the one on the throttle side, just trim the end piece off the grip to stop it rubbing on the bar-end…
The cable from each grip needs to be cable-tied to the handlebars but pay particular attention to the throttle side because it needs some ‘slack’ so that the grip can be rotated (obviously), so before fitting your cable-tie leave a small loop and check that you can fully rotate the throttle and that it snaps back into the idle position when you let go.
You can now fit the Heat Controller to the handlebars using the clutch-lever fixings.
WARNING! Before you finalise the routing of your cables toward the fuel tank, just make doubly sure that you have enough play to turn your handlebars fully left and fully right without stretching the cables. Also check for any signs of the cables being trapped or pinched when on full lock.
The next job is to route the two grip cables to the centre of the headstock so that they can both be routed under the fuel tank.
This obviously means lifting the tank up at the front end. Don’t worry, they’re designed to do this and it’s a simple job - just remove the top cowl with a 5mm Allen key and then pull off the black trim below it (it’s secured with a couple of plastic trim-pins).
This is where it gets tricky. Well not tricky, but you have to make sure you route the cables in such a way that nothing gets trapped/damaged when you lower the fuel tank. I strongly suggest that you examine the underside of the tank and decide yourself which way to route the cables. I only show my own routing choice so you can see what I opted to do.
Looking under the fuel tank, I determined that there was enough room between the air box and the tank for the cables and there was no danger of chafing. I would have been far happier if the Oxford Grip cables had been long enough to reach the under-seat area, but they’re annoyingly short.
When you’re routing your cables, use cable-ties along the way but don’t over-tighten them! Here’s where I routed mine (remembering that green is throttle side and yellow is brake side. When you’re routing the yellow-tagged cable, just bear in mind that you’ll be running the Controller-Cable along the same path.
Once you have them going over the airbox, you need to connect them to the Controller Cable (shown here in red). Surprisingly, the connectors are handed, so don’t be forcing the wrong connectors together. When you’re finished, you’ll have one power-connector left. This is for the lead which runs to the battery.
Now my battery area looks quite busy because I’ve got multiple accessories fitted, but yours will probably be much clearer. Once you have power to the grips, switch them on to make sure everything’s working okay before putting the bike back together again.
And that’s it - job done! No more cold hands 🙌
Hope this helped someone.
Tom.


No comments:
Post a Comment