Showing posts sorted by relevance for query lifepo batteries. Sort by date Show all posts

Wednesday, 27 February 2019

LifePO Batteries Explained


LifePO4cell Batteries

UPDATE : Since writing this post, my batteries (an 8.4Ah and 4.8Ah) are approaching their 4th birthdays. They have been 100% trouble-free and I've been incredibly happy with my purchase. I've mainly used the 8.4Ah for my longer outings and the smaller one for more local work. I have used them with Elecraft KX3, Icom IC-7100, Yaesu FT-818 and more recently with my Icom IC-705. The big battery seems almost impossible to drain!! HIGHLY RECOMMENDED!


When I bought a couple of LifePO4 “ZIPPY FLIGHTMAX” batteries from HobbyKing to power my radios while out and about, they arrived with zero information about how to look after them. No advice on how to use them, charge them, maintain them or store them. I was aware that they could be dangerous and that they had specific charging requirements in order to prolong their life. So, after spending ages trawling the internet, I've learned a bit. Hope others find it useful. 


Rechargeable Li-ion, Li-Poly and Lithium Iron Phosphate (LiFePO4) batteries differ from the standard Lithium batteries in that the latter are not rechargeable. The lithium-ion batteries Li-Ion usually have a nominal voltage of 3.6V or 3.7V., The LiFePO4 have a nominal voltage of about 3.2V or 3.3V and the lithium-polymer Li-Po batteries have a nominal voltage of 3.6V per cell. With Li-ion and LiPo batteries the recommended per-cell safety zone is usually between 3V (fully discharged) and 4.2V (fully charged), although they can normally discharge down to about 2.8V without any problems. 

Discharging below that level may cause irreversible/irreparable damage. Therefore, these batteries often feature a built-in safety mechanisms, preventing over-discharging. 


Conversely, overcharging can also be dangerous. The Li-Po batteries have lower number of recharging cycles than LiFePo4 (1000@0.2C rate, IEC Standard). The projected/estimated life of a Lithium-Ion battery is approximately 3 years from production. 


The LiFePO4 batteries exhibit slightly different properties: They have a bit lower operating voltage of about 3.2V – 3.3V, the minimum discharge voltage is 2.8V and the maximum charged voltage is 3.6V. The LiFePO4 is a kind of Li-Ion rechargeable battery intended for high power applications, such as EV cars , eBikes, electric bike, Power Tools, RC or HAM Radio. 


The LiFePO4 batteries have more constant discharge voltage and are considered to offer better safety than other Lithium-based batteries. Other advantages of the Lithium-based rechargeable batteries include the ability of a much faster recharge and higher discharge rates than other chemistries mentioned and usually higher number of recharge cycles (>2000@0.2C rate, IEC Standard) , meaning longer life when not fully discharged, but its energy density is lower than normal Li-Ion cell (Li-Co). LiFePO4 life expectancy is approximately 5-7 years. 


The S’s


A single LiPo cell has a nominal voltage of 3.6 volts. Since battery packs come in different sizes and voltages, it is more convenient to denote the voltages by saying 10S rather than 36 volts. To find out the nominal voltage of any pack, take the number before the S and multiply it by 3.6. This will render the voltage for the pack. So, a 13S pack will have a nominal voltage of 46.8 volts. 


A single LiFePO4 cell has a nominal voltage of 3.3 volts. Since battery come in all sizes, it is more convenient to denote the voltages by saying 12S rather than 36 volts. To find out the nominal voltage of any pack, take the number before the S and multiply it by 3.3. This will give you the voltage for the pack. So a 16S pack will have a nominal voltage of 52.8 volts 


The P’s

To increase the capacity of the battery pack, additional LiPo cells can be added in parallel to keep the voltage constant while doubling the capacity. Let us take an example of a 10S LiPo with a total capacity of 2000mAh. Now, to get 4000mAh, we have to take another 10S/2000mAh pack and wire it parallel to the first pack. This would then be denoted by 10S2P, where the P indicates how many 10S packs there are in that battery. 


Ah: The capacity of the battery pack is stated as a rate rather than a quantity. 10Ah means that it will take a 10A load an hour to drain that pack. So if we applied a 20A load to the pack, it would be drained in half an hour, disregarding internal losses and such. To make a pack last longer, one may want one with a large Ah number. 


One could also increase the available capacity by taking two identical LiPo and wire the leads in parallel, positive to positive and negative to negative, before connecting it to their appliance. That would double the capacity while maintaining the voltage. If we wired the leads in series, one positive lead of battery 1 to one negative lead of battery 2, we would end up with twice the voltage at the same capacity. This is useful when we only have 5S batteries at hand and a 10S battery is needed. When combining batteries, the participating batteries must all be identical in voltage and capacity. 


C Ratings:


The first set of C ratings on a LiPo tells us how fast the battery can be discharged. 20C/30C translates to (maximum constant discharge rate) / (Burst discharge rate). Burst can last for up to about 10 seconds. To figure out how many amps this rate is, you need to know the capacity of the battery pack. If the pack says that it has 10Ah, take that number before the Ah to get the number of amps. In this case, it would be 10. 


That is your rating of 1C for that pack. Therefore, if the pack says it can safely continuously discharge at 20C, then that means it can supply a constant 100 amps of current. The burst rate would then be 200 amps for 10 seconds. The smaller C rating following the first pair is the charge rate. LiPos must be charged at a much slower rate than its discharge rate. Most packs are good with up to 2C charge rate (for this example, it would be 20 amps). 


Charging - Discharging rates


To charge a LiPo pack, it is highly encouraged to use a charger that supports individual cell balancing or a charger and a battery pack with a BMS. This way, all the cells come off the charger at equal voltages so they all charge equally. When using that charger, you will notice that the charging current drops off as the pack nears its maximum charge, 4.2 volts for one Li-Po cell and 3.6V volts for one LiFePO4cell. This is done so the charger does not overcharge the cells which will cause a fire. Determined in the same fashion as the C ratings for discharge, the C rating for charge tells you at what amperage you can safely charge your battery. This information is generally listed on the back of the battery with all the safety information. For a 10 Ah battery, 2C means that it can be charged at 20A (2*10A). 


Proper Charging


It’s important to use a LiPo compatible charger for LiPos and LiFePO4 compatible charger for LiFePO4 batteries. They charge using a system called CC/CV charging. It stands for Constant Current / Constant Voltage. Basically, the charger will keep the current, or charge rate, constant until the battery reaches its peak voltage (4.2v/ 3,6V per cell in a battery pack). Then it will maintain that voltage, while reducing the current. On the other hand, NiMH and NiCd batteries charge best using a pulse charging method. 


Charging a LiPo / LiFePO4 battery in this way can have damaging effects, so it is important to use a LiPo / LiFePO4 compatible charger as appropriate. 


Internal Resistance ( IR)


Internal Resistance is a measure of the difficulty a battery has delivering its energy to a motor and speed controller. The higher the number, the harder it is for the energy to reach its destination. The energy that doesn’t "go all the way" is lost as heat. So the internal resistance is a kind of a measure of the efficiency of the battery. However, there is a correlation between the C-Rating of a battery and the internal resistance of that battery. In general, batteries with a higher C-Rating also have a low internal resistance. 


As a general rule


· per cell rating between 0-6 mΩ is as good as new 

· Between 7 and 12 mΩ is reasonable 
· 12 to 20 mΩ is where the signs of lower capacity start to be observed 
· and beyond 20mΩ per cell, one may want to start thinking about retiring the battery pack 

BMS


A battery management system (BMS) is an electronic regulator that monitors and controls the charging and discharging of rechargeable batteries. The BMS comes included in battery pack. Battery management systems may be as simple as electronics to measure voltage and stop charging when the desired voltage is reached. At that point, they might shut down the power flow; in the event of irregular or dangerous conditions they might issue an alarm. 


A more complex BMS monitors many factors that affect battery life and performance as well as ensuring safe operation. They may monitor one-cell or multi-cell battery systems. Multi-cell systems may monitor and control conditions of individual cells. Some systems connect to computers for advanced monitoring, logging and more. A more complex BMS also monitors the temperature of a battery pack and can “cut-off” when the battery temperature is too high while charging or discharging. 


The small battery-tester above costs just a couple of £, so it's worth buying 2 or 3 so that you can keep one handy say in the garage, in your shack and in your go-pack. You simply connect it to your battery's Balance Connector and it will cycle through some figures...

. Overall battery voltage

. Cell-1 voltage
. Cell-2 voltage
. Cell-3 voltage
. Cell-4 voltage, etc

This is a convenient way to find out if your battery is not only charged, but also balanced! Just be aware that when you plug it in, there is a loud beep which will probably give you a bit of a fright, LOL.


Care: · 


A LiPo / Li-Ion cell should NEVER be discharged below 3.0V 


· A LiFePO4 cell should NEVER be discharged below 2.8V 

· Charge the battery pack fully after every use Storage: 
· Always store the batteries fully charged. 
· When not using the cell pack for an extended period of time, remove it from the appliance and store in a place with low humidity and low temperature 
· Inspect and Recharge the battery every few months 

UPDATE: Since posting this, I've had one person saying they should be stored at 50%, another said 70% and another at 80%. Clearly, the storage issue is as clear as mud and everyone has a different opinion. So decide for yourself. Personally I think I'll drop my LifePO4 to around 3.2V per cell if I'm not going to be using them for a while.

Please make a note of NIGEL BARKER's advice in the "Comments" section about these batteries being very much affected by temperature. The batteries don't like extremes of temperatures and you have to compensate for extreme variances. 

In high temperatures (forget the UK, LOL) you should probably drop the voltages of stored batteries. In freezing temperatures (yes, UK) the batteries may resist charging!

Safety


There are tons of safety precautions related to the use, storage, and disposal of Lithium Polymer batteries. Some safety precautions: Each one must be taken seriously since these high-power batteries will pack a punch when not used correctly. There are records of many things -from cars to entire houses - that have burnt down due to the misuse of LiPos. 


Never leave charging batteries unattended. If a battery goes wrong, you will have an incredibly intense chemical fire which produce massive amounts of smoke too. Google “Lipo Battery Fires”. I charge mine in a steel cabinet in the garage and each battery goes in a fireproof bag. LifePO are much more stable than Lipo but still need treating with respect – especially the bigger batteries! 


Never overcharge past 3.6 or 4.2 volts per cell. Over discharging will kill the pack. Drawing too much current from the pack can cause it to puff up and catch fire. Always use a proper BALANCE CHARGER like the Turnigy Accucell 6


REMEMBER:
  1. Do not charge or use batteries if the battery ...
    1. is punctured or damaged
    2. is bloated, expanded, swelling or otherwise deformed
    3. has any cell with a voltage below recommended value
  2. Do not charge batteries unattended. Monitor batteries during charging for popping, hissing, smoke, sparks or fire. Also monitor the battery for any swelling or other deformities. Disconnect the battery from your charger immediately.
  3. Do not charge batteries near flammable material. Charge batteries in a fireproof container. Do not charge batteries while they are inside a device or inside a carry-case/rucksack.

Personally, I charge my batteries in my garage. I don't want to start being too paranoid about all this, but I do believe it's better to be safe than sorry! If (and it's a big if), a battery decided to go bad and catch fire, I want to be in a position where the fire can be contained and allowed to burn out without the risk of spreading and hurting someone.

So in my garage I have an old steel filing cabinet which I got from work (they were throwing it out). In the top drawer I place my batteries in their fireproof bags. Nothing else goes in that drawer!


I keep my charger on the outside of the cabinet and simply drop the charging lead into the top drawer.  IF a battery was to go bad during charging (or storage), the fire (it's actually a chemical fire - a very fierce one) would be contained within that safe area. 


Of course there would be extremely dense smoke billowing out, but there's nothing you can do about that, other than to let it escape through a wide-open garage door.


LET'S NOT BLOW ALL THIS OUT OF PROPORTION THOUGH because LifePO batteries are infinitely more safe and stable than the old Lipo batteries. And there's a large degree of sensationalism on YouTube driven by young lads who find it amusing to short them out for a firework display. 


Since writing this post, I have changed all power connectors to Anderson Pole connectors.


UPDATE : NOV 2021

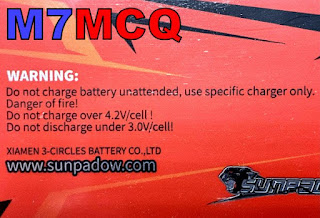
I recently purchased an extra battery to use solely with my QRP-Labs QDX QRP Transceiver. It's a 7.4V 5500mAh Lipo with a balancer lead. This connects directly to my Turnigy Accucel 6 charger. I couldn't use either of my LifePO batteries because they're 13.2V and I needed 9V or less. The new Lipo has useful information written on the back of it stating very clearly that the cells should not be charged over 4.2V allowed to discharge lower than 3V.  For storage, it's best to have the voltage somewhere inbetween.


UPDATE : JAN 2022

I did something silly today - I left my battery connected to a Kenwood TS-2000 that I had borrowed and I took a phone call and got distracted. As a result, the radio drained the battery flat as a pancake!!

The end result was that my 8400mAh 13.2V LifePO battery had gone below the minimum acceptable voltage level and could no longer be charged - potentially junk!  😭

A tester revealed that two of the battery's cells were in a Fault state and the battery charger gave out a Battery Voltage Too Low warning and refused to charge. I decided that there was no use keep trying and so in desperation I changed the setting to NiMH and disconnected the Balance Lead.

With the charging current set to 2A, I started the charge and stood there watching the voltage of the battery slowly increase. There were occasions where it also started to go backwards briefly, but then it would get back on track and eventually reached 12.5V which meant that the cells were at 3V each and SHOULD (in theory) take a normal balanced charge.

I stopped the NiMH charge, reconnected the Balance Lead and started a LifePO charge. Thankfully, the charger accepted the command and my battery is now back to normal. PHEW!!!

UPDATE : AUG 2022

My 
13.2V LifePO batteries are now heading toward their 4th birthday(!) and they’re still working perfectly. So dependable out in the field.


If you benefited from this post in any way or have something to contribute to the Blog, please comment below or drop  an email to m7mcqio83ro@gmail.com

73, Tom.

Wednesday, 9 January 2019

>>>> FIRST POST!

Hi and thanks for visiting my blog. I'll start by saying that I'm six decades old and I live in the North West of the UK in a small place called Horwich (about 15 miles from Manchester).

I've been interested in six things since being a young lad - cars, motorbikes, photography, art and radios (I'll let you guess the sixth).

In the 90's I was an avid Shortwave Listener and spent many happy hours with a Lowe HF-150, an AOR AR3000A wideband receiver and a Yaesu FT-290R Mk1. I would have liked to have taken my Amateur Radio test, but back then the college courses were very lengthy and you had to learn morse at 12wpm. I was just too busy for all that - I had a disabled son and a demanding job! So I stayed as an SWL.

The years rolled by and the internet became available to me in the late 90's, so my interest in computers grew, resulting in a loss of interest in radio. Anyway, roll forward 18 years and here we are - a Foundation Licence can be acquired after just a few weeks of coursework and practical studies! So I've enrolled on a course at the West Manchester Radio Club and I will hopefully soon have a CallSign.

In the meantime, I've been doing a lot of listening and have built up my 'Radio Shack' in a corner of our Hobby Room. This neat and tidy room was originally our "Art Room" (we both paint) but now it has become the place where we go to do anything including painting, radioing, crafting, etc, etc.


--------------------------------------------------------------------

It has since been transformed to this (in my corner, anyway)...


RADIO EQUIPMENT...


  • Yaesu FT-897 HF/VHF/UHF Transceiver
     
  • Yaesu FT-290R Mk II VHF/UHF Transceiver
     
  • Kenwood TH-D74E HandHeld Transceiver
     
  • Baofeng UV-9R HandHeld Transceiver
     
  • Tecsun PL-680 Wideband Radio
     
  • SDRPLAY RSP1A Ultra Wideband SDR
     
SUPPORTING EQUIPMENT...
  • G5RV Half-Size HF Antenna
     
  • X-300 VHF/UHF Antenna
     
  • SOTABEAMS BandHopper-2 Portable Antenna
     
  • LDG AT897-PLUS AUTO-ATU
     
  • YAESU FC-20 AUTO-ATU
     
  • BHI RADIOMATE
     
  • BHI DSP Speaker
     
  • ICOM EXT Speaker
     
  • SENNHEISER Headphones
     
  • ALINCO DM-330FX PSU
     
  • FTL Meter (S,SWL,W)


I also had a fabulous Yaesu FT-1000 Mk5 but I decided to sell it because my real interest in radio these days is in portable work - and the FT-1000 is not exactly small and light enough to throw in your rucksack, LOL...


So, my main rig is the FT-897 which is a great Multiband, Multi-Mode portable radio which packs an awful lots of features into a small package, thanks to the extensive use of a menu system (which takes some getting used to). 


The radio comes as standard with no built-in power but a pair of Lithium batteries can be neatly installed in the lower section. Unfortunately, the batteries are extremely expensive, so instead, I opted to install the FP30U Mains Supply.


Outdoors, it can be powered up by my car battery, or (more likely) by the LifePo batteries that I purchased specifically for the job...


These bad-boys are much lighter than car or motorbike batteries and their design is much more appropriate to the task in hand. The trouble is with them, they can be HIGHLY VOLATILE during the recharging process and this risk has to be taken VERY seriously or the consequences can be life-changing! Just google "lipo battery fires".

The FT-897 is a very rugged looking radio and straight away, you get the impression you're not going to break it easily. It has feet on the base and on the edge, with a beefy carrying handle on the side. Handily, there's an option to fit an ATU to the side of the radio and the official accessory is the FC-30 but a much better option is to install an LDG Auto897PLUS if not for any other reason than it has a CAT throughput.


The FT-897 is designed for portable use and everything about it is "energy saving". Even the display is purposely small so as to consume less power when you're operating out in the field. That's great! But when you're back in the shack, you might want to have a better view of the signal strength meter to give out quick and accurate reports. The answer to the problem is to connect an external meter such as the FTL Meter. It plugs into a tiny socket underneath the main dial and provides a variety of readings.


For HF, the FT-897D will be used with my very portable SotaBeams BandHopper II which is resonant at 20 and 40 metres. It's basically a long wire dipole and is usually operated in an Inverted-V configuration using an extending fishing pole. I use the SotaBeams Tactical 7000HDS telescopic mast.


Here's a video showing it in use...


An old friend of mine is the Yaesu FT-290 2M portable. They call it the "Voice In The Bag" because of the carry case that most people use it with. The original Mk1 that I had in the 90's had a built-in battery case for portable use, but the Mk.2 that I have needs to be powered from a separate source - that's because the 2.5W output has been boosted to 25W thanks to a Linear Amp that is clipped to the bottom of the rig. This occupies the area where the battery box would normally live.


This is a great little radio and is the perfect rig to take with you on a hill-climb. It has a neat BNC plug on top for telescopics and a regular PL259 on the base of the linear for connecting bigger antennas such as a small vertical or yagi.


Friday, 2 October 2020

XIEGU G90 SDR REVIEW

 WEEKEND TEST

With a wet weekend ahead and little danger of the wife dragging me out somewhere I didn't want to go, I thought I'd take the time to have a play around with my latest acquisition - the XIEGU G90 SDR QRP Portable HF Radio.

I'd seen these around the internet and mentioned in the magazines quite a few times and I didn't pay them much attention at all - to be honest, I'd kinda ignored them because I already have the fabulous YAESU FT-818, so what did I need another QRP transceiver for?? Well the truth is, I don't need another QRP transceiver, but what's that got to do with anything? Like most other Hams, I just like getting new radios and experimenting.

The thing that triggered this little purchase was an online conversation with a friend. He'd just acquired one and was telling me about it, so I then started to read/watch a few reviews and discovered that people really did rate this rig - a lot! And it wasn't a scary chance-purchase from China like all those unbranded amps and stuff that you constantly see on eBay. The Xiegu has partnered with MFJ, so it's not going to be an overnight fling.

So soon after, I found one that an old mate was selling one and it was actually brand new in the box and I got it for a saving of £165 on RRP with extras!! How could I say no to that?? In all honesty, I probably wouldn't have bought one at full price because of the 818 sat in my ruscksack, but at this price I just couldn't resist.

Built just a couple of months ago

As you can see from the photo at the top of this post, the radio arrives in a neat, well-padded box containing everything you need to quickly get on air. They even include a programming cable (which many manufacturers charge extra for). The manual is surprisingly well written and contains enough instruction to get you on-air. In all fairness, the radio is surprisingly intuitive to use and there's plenty of really good videos on YouTube to help you get to grips with more technical issues.


I was immediately impressed with the heft and quality of construction - it seemed much nicer built than I'd expected. Mind you, there's some really crummy images of the rig on the internet so that probably effected my judgement previously. Now that I can see it in the flesh and handle it, I have to admit that it's a nice bit of kit. Sure, it doesn't have any sexy contoured styling (it's quite angular and sharp-cornered) but it is still very well presented.


The switchgear is well laid out and most buttons have multiple functions which, like I said earlier, are very intuitive. At the rear of the unit, there is a single SO239 and various ports for a key and other accessories and input/outputs. The power-connector is quite unusual and some people may have never have seen one like it before, but it is actually a common connector in the RC world and is made by Tamiya - very easy to get hold of. And just below that is the GROUND connector which is a nice, easy to use thumb dial - no screwdriver required!


You'll notice from the photos that the radio is fitted with guard rails front and rear. This is another nice touch from Xiegu and something that you normally have to pay extra for. It does seem a little odd though, that they didn't incorporate some sort of folding feet in the design of those rails. They don't even include any rubber feet on the base 😮 

Luckily for me, my radio came with a 3rd party stand which also doubles up as a cooler system. I believe that this cooler is quite a common purchase because the fanless G90 radio may run very hot when transmitting at 20W in CW or DATA modes, so it makes sense to find a way to cool things down. How effective it actually is, I don't know, but judging by the size of the fan, I'd hazard a guess that it's more effective than Yaesu's SMB-201 with it's tiny fan. The fan, by the way, only kicks in when (if) the temperature reaches a certain point (60 degrees)). When running, the fan consumes 150mA.


The fan is unprotected and when you try to pick up the whole unit from the desk, you naturally put your fingers underneath where the blades are. I decided to fit a steel finger-guard which not only protects the blades, but also makes it very easy to pick the unit up.


Apart from providing a cooling system and an adjustable stand, this device also provides connectors for powering accessories. On the side of the unit is a Tamiya connector and an Anderson Pole connector. That's neat!

I also fitted a 12V colour temperature gauge and replaced that plastic VFO knob with a nice metal knob. I think it looks much better and certainly feels better.


Back to the radio - On the right of the G90 is the RJ45 connector for the supplied hand mic. And this is no cheap mic either - it's an Icom type unit with a great range of buttons and it's also illuminated! I remember just how surprised I was when I opened the box of my Elecraft KX3 to find that they didn't even include a microphone even though the radio was £1800!!! Well done Xiegu for not penny-pinching (or yen-pinching).


On the left front side, there's a couple of 3.5mm jack plugs - one for headphones and one for firmware update of the head unit (there's a matching jack plug on the rear of the base unit for programming that). It's not uncommon for separate units to need separate updates. It's worth noting that although the headphones on QRP radios are often heavily used, they may not be so on this radio because it has a fantastic speaker built in, with very good volume levels. Elecraft would do well to take note from Xiegu in this respect!


The spec of the radio is really quite impressive, not least of all because of that amazing TFT screen. Yes, it's tiny at just under 2" but so too is the 818's screen. The G90's screen is full colour and razor-sharp! It really is quite impressive and the waterfall and panadapter are fantastically usable even at this size.


The scope has a really fast response time and is an incredibly useful tool to have when working outdoors - and it's a fully active scope too, so you don't have to keep refreshing it. There's limited bandwidth on display, but that suits me fine - if I can see too much of the band at once, I tend to be flicking backwards and forwards all the time.

The receiver covers 0.500MHz through to 30MHz and you can transmit from 10-160M. Some people complain about 6M not being included but personally, that doesn't bother me too much. Operating modes include CW (there's also a great built-in CW Decoder), AM and SSB. A recent update brings FM into the mix too somehow, but I've not done an update yet.

 
It should be noted that there is no provision for internal battery power like there is on the 818 and others. That's disappointing to some operators but not to me because I virtually never use anything other than my 13.2V Zippy FlightMax LifePO batteries when out and about. They're incredibly light and keep their voltage right until the death.

Speaking of voltage, you will probably come across a video where Bob Nagy demonstrates how the Xiegu G90 keeps on pushing out its full power when running on anything from 13.8V down to 10V. That's amazing and makes it so much more usable with different power supplies.

Like my beloved IC-7100, this radio includes a very nice SWR Sweep function. In fact, it's actually better than the 7100. This is one of those features that isn't at all essential, but it sure is nice to have - especially when you can have it without having to lug anything extra with you. The unit also allows you to set an SWR figure at which you want the radio to protect your finals. Maybe you want to play it safe and shutdown at >1.5 or maybe you are happy to go up to 3.0. It's up to you to decide.

The built-in ATU is crazy good at finding a match on virtually any antenna and it does it super quickly!! I always used to praise the Elecraft KX3 for its tuner, but this one is every bit as good. And that's another extra item that you don't have to pay for (or lug around with you like I do with the FT-818).

When active, the ATU pushes out about 7 or 8 Watts even though you may have the TX Power set to 1W. That seems a little odd, but hasn't caused any issues. It's also odd that you cannot set power to zero, so there may be an occasion where you unintentionally transmit into say an Active Receive Only antenna. Again, not a huge problem, but I'd sure prefer the option of being able to set the radio to Zero-Power.

The radio might benefit from a TCXO because the claimed frequency stability is only +- 1.5ppm whereas the FT818 with it's built-in TCXO9 oscillator is +- 0.5ppm. In practise however, I couldn't really detect any drifting.
 

So, now for the actual testing of the radio
Nothing scientific - just my old ears. 

I thought I'd give it a quick try on my home QTH EFHW before heading out in the cold damp October weather tomorrow. I connected it to my EFHW and looked on 20M for a signal. There was one at 14.274MHz but that particular frequency was VERY NOISY (quiet either side of this - Sod's Law 😂).

I listened to the operator for a while (IS0FDW) and when a break appeared, I gave him a shout. He immediately came back to me and was very complimentary about my signal and modulation. That's 1800km on a wire from a less than ideal location using half the G90's available power. Not bad.


I spun the dial and listened in on a few more stations across the bands. The G90 has no problem picking up signals and switching between this and my IC-7300, revealed that the only real world difference was the floor noise.  I managed to speak to a couple of UK stations on 40m and got some great signal reports from them too. I also got a few more unsolicited complimentary audio reports. It seemed strange that people went out their way to mention the audio - must be good!

Then I updated the radio to V1.75 and it became even easier to use. Switching to CW, I tuned around for some CW signals to see how well the built-in decoder worked. I don't think any of them are perfect, but I'd say it's every bit as good as the one on the FT-DX3000.


The update process was fairly straight forward as long as you follow the instructions to the letter. There's a point in the update were you have to switch on the radio and then press a key on your computer's keyboard - do it quickly or you'll have to restart the process.

Also, don't be tempted to use another Terminal Program other than the one which is supplied in the Firmware Update Zip File!

Like I said previsously, the G90 is definitely noisier than the 7300 but you wouldn't expect anything else! The filters are quite good once you learn how to trim the Low/High parts of them. This little QRP radio will come into its own in the great outdoors away from noisy urban interference. 


I look forward to getting to the Trough of Bowland with a good dipole this weekend and then I will report back with more experiences of this neat little SDR radio.

73, Tom. M7MCQ.

UPDATE : I was unable to play outdoors due to the UK's horrible weather this weekend. I tried the radio on my EFHW and G5RV and was very happy with the results. Having that panadapter and waterfall will be incredibly handy out in the field and should result in far fewer missed opportunities.

I spoke to quite  few operators from all over Europe and the UK on SSB. I'm sure that I'd have been able to make some Transatlantic contacts too if I'd still been on the radio later in the day. I can't wait to climb a hill and setup a resonant dipole. This radio is a little bundle of fun!

COMMENTS :

Very readable review, matches my own experience over the past year. Just a couple of points wrt updating:
- When rebooting, hold down the key WHILE rebooting, don't try to be ultra-fast AFTER rebooting 🙂 That's what most of us do.
- There is a very efficient little command line terminal app which Dale Farnsworth wrote for the G90 (search for his name in the Group), originally for Linux and Mac, now for Windows 10. Much simpler and faster than Teraterm.


Thanks for visiting - please take a minute to leave a comment below 

73, Tom, M7MCQ.

Monday, 16 October 2023

HANDY BATTERY CASE

 I recently purchased a light, tough little case to carry a radio around in, but then found another use for it.  Like many hams, I’m a little addicted to cases and boxes 😂 so when I saw this one for £17, I just had to have it.


It looked like it was tailor-made for my Zippy FlightMax batteries! Both the 4200 & 8400mAh LifePO’s sat side by side inside the mesh covered base, leaving ample space in the lid for my Accucell 6 Balance Charger (complete with leads and even a battery tester). 


So I now have everything neatly stored in one convenient location. The case can be left in the back of my truck, always ready for action. I just hope the batteries never go rogue or it could be a very expensive storage decision 😂