Friday, 20 January 2023

ELECRAFT AX1 MOD by AH6X

Elecraft AX1 Review and Modification

By Rob Ramsey, AH6X

I recently purchased and received an Elecraft AX1 antenna. Since then, I’ve tested it and made two significant modifications that I found helpful and wished to share. 

Though the stock antenna configuration works as advertised, through experimentation, I have discovered it is possible to make it resonant on 10, 12, 15, 17, or 20m. 

Elecraft markets the AX1 as a field expedient antenna that supports operation on the 15, 17, and 20m bands with a tuner. Some tradeoffs were made as packaged: a single 13ft radial, the 46.25in whip, and a 20m/17m switched coil assembly. The stock configuration lives up to its branding and delivers an experience proportional to its compromises. However, more is possible. 

The AX1’s vertical element is too short to be resonant on 20m. This limitation can be overcome by adding additional coil or by using a slightly longer whip antenna. 

The single radial is a similar situation; with a 13ft length, it’s not resonant on any specific amateur band. A multi-element radial could be used with resonant lengths for each of the desired operating bands. These trade-offs were probably made for a variety of reasons. 

First, using this antenna in a resonant multi-band configuration requires an antenna analyzer to tune the whip length properly. 

Second, using a longer whip and multi-element radial would increase the cost. 

Third, a longer whip and multi-element radial weighs more and would take up more room than the stock parts. 

Fourth, a longer whip is less stable when mounted to a small tripod or the radio.

Lastly, tuning the antenna and fanning the radials out would take longer than the original deployment strategy, diminishing the antenna’s field expediency. 


Given a choice, many radio amateurs will choose an antenna analyzer over a tuner. Over the last two weeks, I’ve created and tested a 15/17/20m multi-element radial and, with the help of Jon (KG7KMV), an antenna adaptor for the AX1 coil assembly. 

The multi-element radial has been cut per the standard calculations (see charts at bottom of post), and the adaptor allows me to connect any 3/8-24 threaded whip to the 4mm x 0.70 threaded coil assembly.

 The BuddiPole product line has a large variety of telescoping whips. For this project, I used their Featherweight whip, which extends to 72in (6ft) and collapses down to 13in. With it, the antenna can be easily tuned by collapsing or extending the telescoping whip. 

For the multi-element radial, I used Super Antenna MS135 SuperWire with a 14-16 AWG spade connector and some heat shrink tubing. For storage, I wrap the radial around a SOTABeams wire-winder

This custom configuration allows for a 3:1 SWR in the 10, 12, 15, 17, and 20m bands. Overall, I really like the Elecraft AX1 antenna. It’s a good product, made resonant, with just a few adjustments. See images below. 

I also made a "tool roll". My mother-in-law showed me how to sew a wrench roll for my Elecraft AX1 antenna. I use a similar setup for my Super Antenna. The fabric is light, protects the parts, and makes antenna transport easy.

Let me know what you think in the comments. Thanks in advance! 

Rob, DE AH6X. 

Many thanks for your contribution to the Blog Rob! 
A very interesting read. I love this sort of stuff.

Tom, M7MCQ.


Elecraft AX1 mini-review HERE

Wednesday, 18 January 2023

ELECRAFT XG3 SIGNAL GENERATOR

ELECRAFT'S BEST KEPT SECRET?


Since starting to mess around building radio-related kits, I've recognised the value of having tools in the shack to assist with the hobby, but things like signal generators are normally too complex (to me anyway), too bulky and too expensive.

A case in point was when I needed to calibrate my PreppComm MMX and had to burden my friend Chris at Cross Country Wireless with the task.

Enter the Elecraft XG3! It certainly addresses two of the issues - size and complexity, but they're still on the expensive side at $300 😮 


The XG3 can be used for a variety of jobs including receiver testing, receiver alignment, RF tracing and a variety of other tasks. Not only does it generate a calibrated continuous wave signal, but it can also be programmed to send RTTY or CW!

With the free downloadable software, you can program the XG3 to act as a Beacon, repeatedly sending a message - ideal for Fox Hunts or RBN tests. I couldn't quite figure out the syntax of the programming language, so I emailed Elecraft Support and the came back immediately with a great response. I now have "CQ TEST CQ TEST M7MCQ M7MCQ" set in Memory #1.

Most of the time though, you'd be using it to test radio equipment and to assist you with that, it has a number of useful presets.

The RF output has 4 presets ranging from -107dBm through to 0dBm and includes a -73 setting which is particularly handy for testing the accuracy of your S-Meters, since -73dBM is equivalent to S9.

There are 12 Band Settings from 160M to 2M. These are preset to certain frequencies but you can adjust these using the computer software mentioned previously. You can change these frequencies to anything ranging from 1.5 to 1400MHz but great accuracy is only guaranteed below 200MHz. Anything above that relies on the harmonics of the fundamental of the RF signal.


Another handy feature of the XG3 is the SWEEP function. Using the PF1 or PF2 buttons, you can initiate a sweep of the signal across a range of frequencies programmed by you.


On the top of the XG3 case is an input for an external power supply, a PC programming port and the RF-Out connector which is BNC. At the rear of the case is a battery tray to carry the 9V PP3 battery. Thankfully, the unit has reverse-polarity protection, because it's oh so easy to put it in wrong 😳

So there you have it. A very nice addition to the shack at a great saving on the new price. I'm quite sure this will be a very handy unit to have around for me and my radio buddies.

73, Tom, M7MCQ.


WM,[15}CQ_TEST_CQ_TEST_M7MCQ_M7MCQ;PF,01,01;

Sunday, 15 January 2023

ANTENNAS : DIY V-DIPOLE (Part 1)

DIY TELESCOPIC-V ANTENNA £35

This is the story of a little antenna experiment. I haven't really got a clue what I'm doing, but I never let that hold me back, lol. 

I was recently walking the streets of eBay when I stumbled upon a pair of telescopic whips with what appeared to be 3/8 UNF threaded ends. This reminded me of an antenna I'd seen on the ML&S website - a MyDel JPC-7 , which was basically a telescopic V antenna mounted on top of a tripod, with loading coils for each leg of the antenna. At £340 it seemed a tad expensive, but in all fairness, you got everything you needed including the tripod and carry-case.

The telescopic whips in question are each over 5M long when fully extended and a pair can be obtained from ML&S for £50, but on eBay I found them for £24. 

Now bear in mind, the cheaper whips that I bought are probably of a lower quality than those offered by ML&S.

When the package arrived a few days after ordering, I was saddened to see that there was only one whip in the box, so I lodged a complaint and quickly received another, along with a 10% refund.

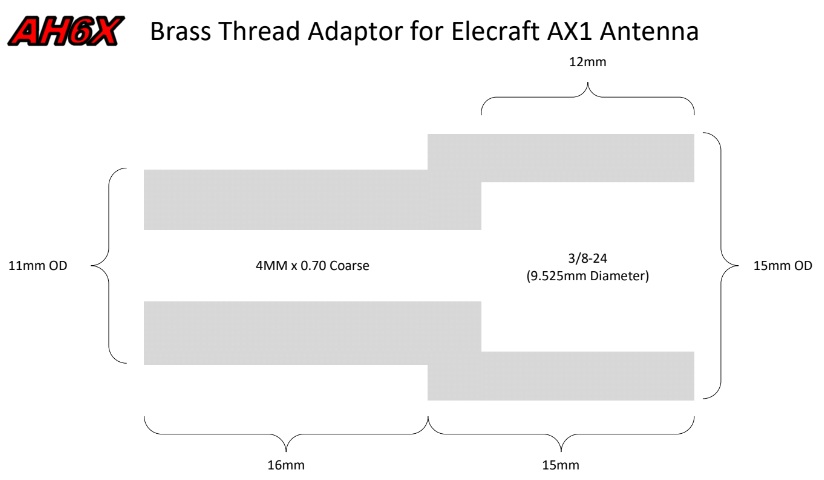
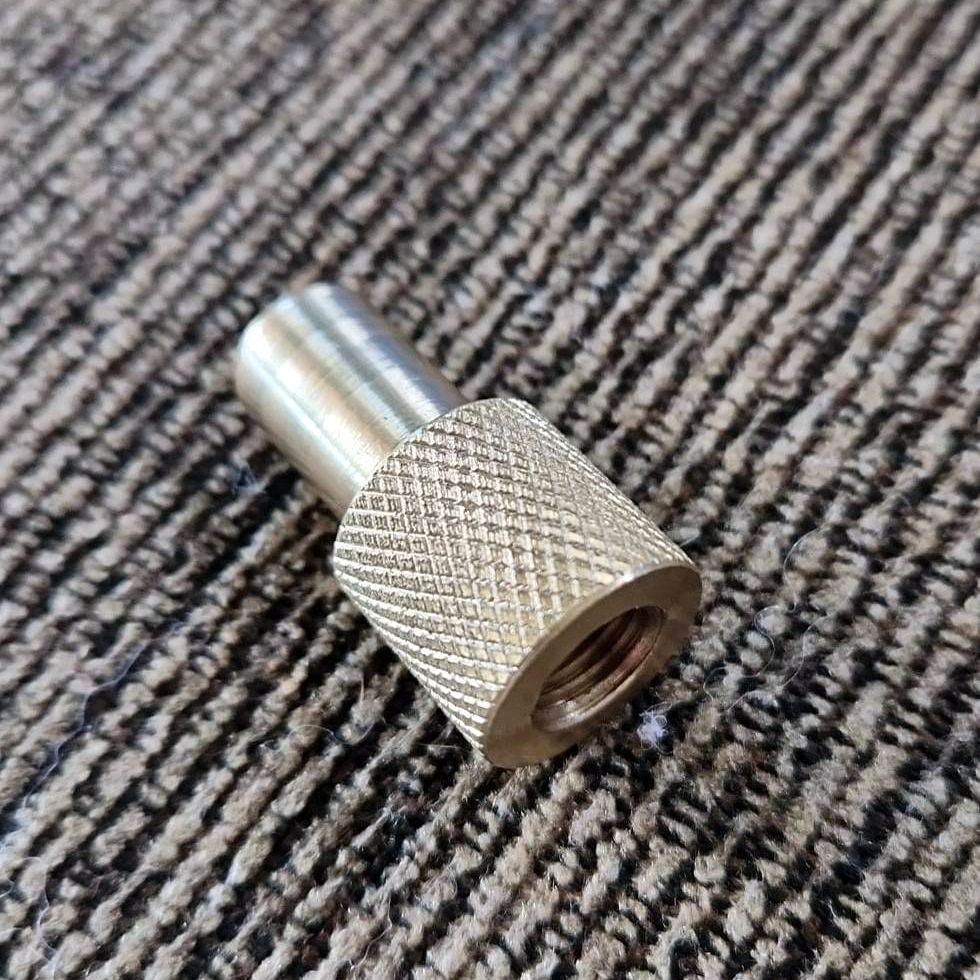
The next thing to order was a V-Shape Dipole Centre, 3/8 to SO-239 at a cost of £11. This would provide the mounting point for the Dipole and give it the V-shape layout for the whips. How strong it is, I'm not really too sure at this point, but it does seem pretty good for light, portable use (ie, not left on top of a roof in howling winds forever).


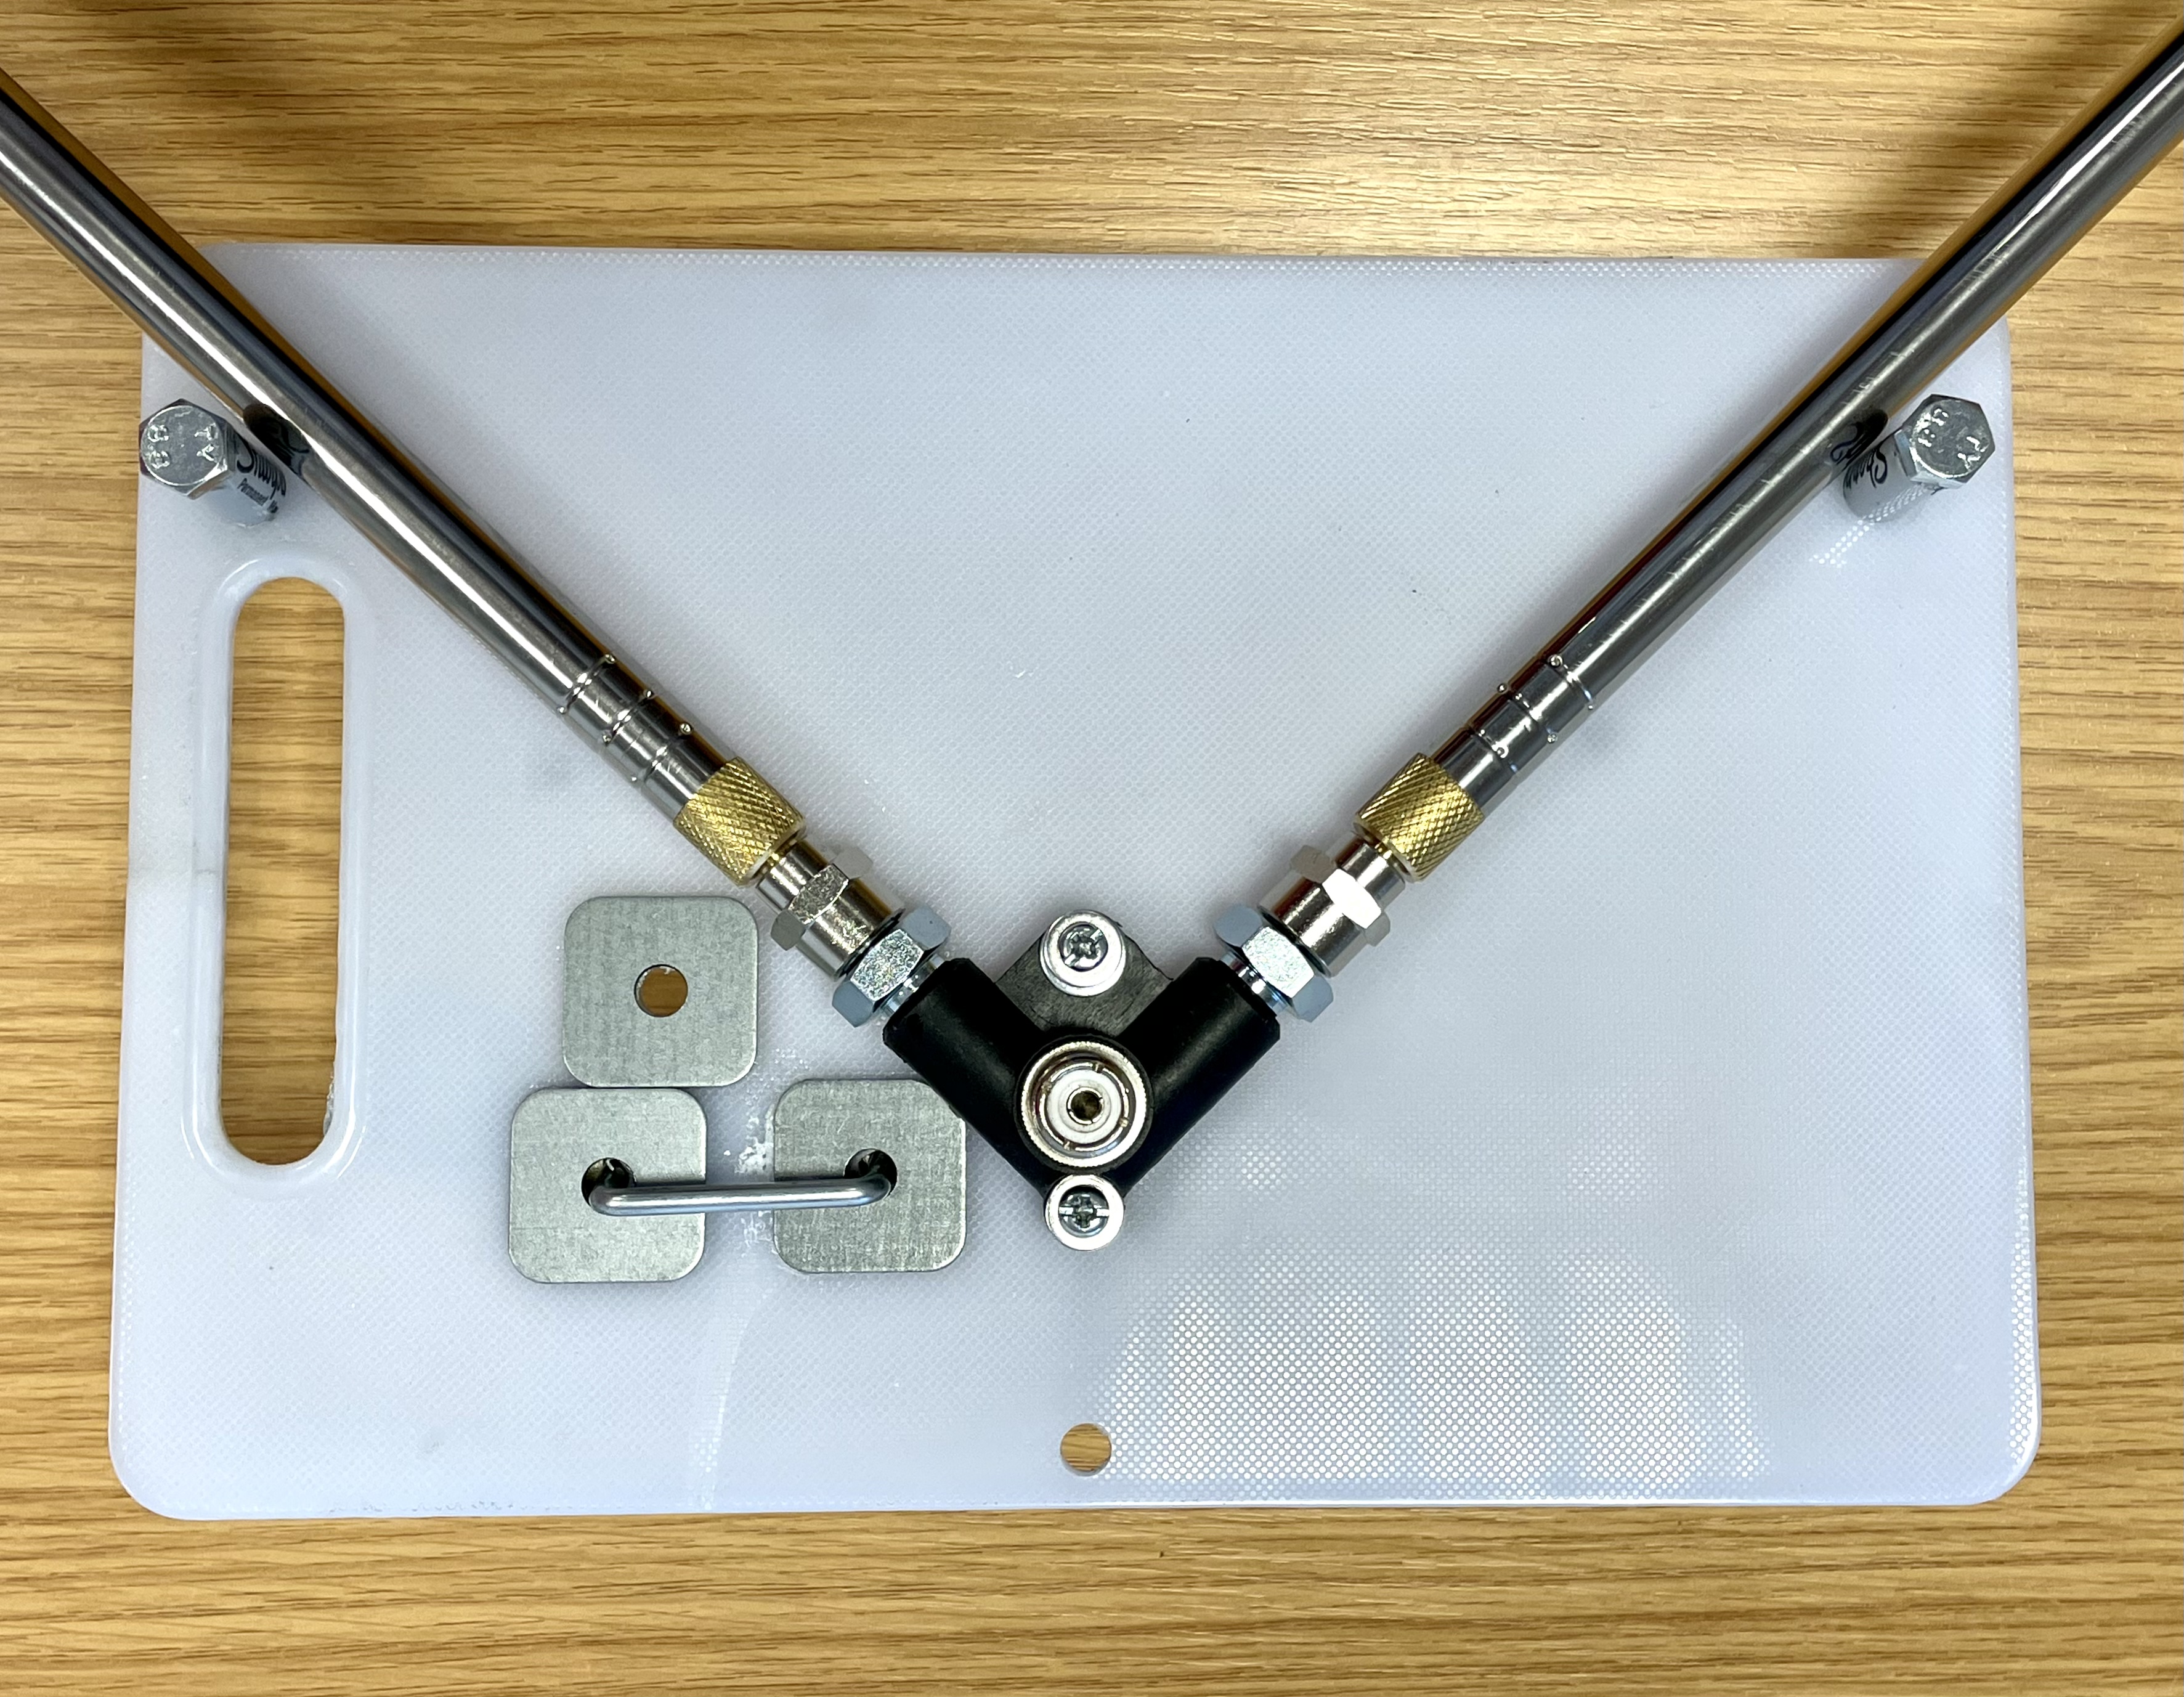
The next hurdle to get over was how to mount the whips to a mast. I had a mast in mind already (my Diamond AM450 4.5M). I started out by fixing the V-Centre SO-239 to a stainless-steel plate from work and drilling holes in the plate to accept a vertically oriented mount or a 45 degree mount (to switch from V to L).


On the reverse side I mounted a Grounding Plug terminated with a female banana socket so that I could easily connect a ground.


With the mast at full height and the whips fully extended to 10 metres, the antenna will obviously be quite a handful without being guyed off. Thankfully, the AM-450 has a built-in guy-ring, so all I'll need is a few lengths of paracord and some tent-pegs.

OOPS!! Change of mind. Although the above design looked really neat and compact, I soon realised that it offered nothing in terms of support to the long whips. Maybe they don't need it - but I was uncomfortable nonetheless, so I went bigger.


Having more space to work with meant that I could offer some support, even though it's only a small amount. I achieved it by placing bolts in the upper corners and isolated them from the whip using part of a Sharpie Pen. Well, you gotta use what's laying around don't you? 😂


I did a quick test to see how it looked but it was incredibly windy, which meant I couldn’t really extend the whips. I did try, but I could see it had all the potential for going pear-shaped, so I only extended the first three sections.


To be honest, I was also not much in the mood for spending any more time outside in the bitter cold after just spending 3 hours cleaning my drive 🥶 
 

Although the weather brightened up by the time the drive was finished, it had got much colder. I’m convinced there’s snow on the way! I’ll just have to wait for a better day to do my trials, but at least I feel happy with the antenna support - it seemed to be strong enough and stable on the Diamond AM-450.

So far so good. But there's a couple of very important components missing here, and that's the loading coils. You can, of course, purchase these loading coils and probably even make your own, but first of all, I wanted to see it I could get away without them by  tweaking the whip lengths and using my Elecraft T1 ATU.

I figured that the best way to start out would be to erect the antenna and connect my NanoVNA to get an idea of where I stood on each band and then adjust the whip-lengths to find the best possible setting. I wasn't really expecting to achieve much, other than to give my tuner the best chance of finding a match. 

The next day the weather improved slightly, so I erected the antenna on the patio, connected a ground wire and raised the mast to 4 metres high. Sadly, my VNA refused to power up, so that looks like another little project to strip it down and see if I can find out what’s gone wrong with it 🤬

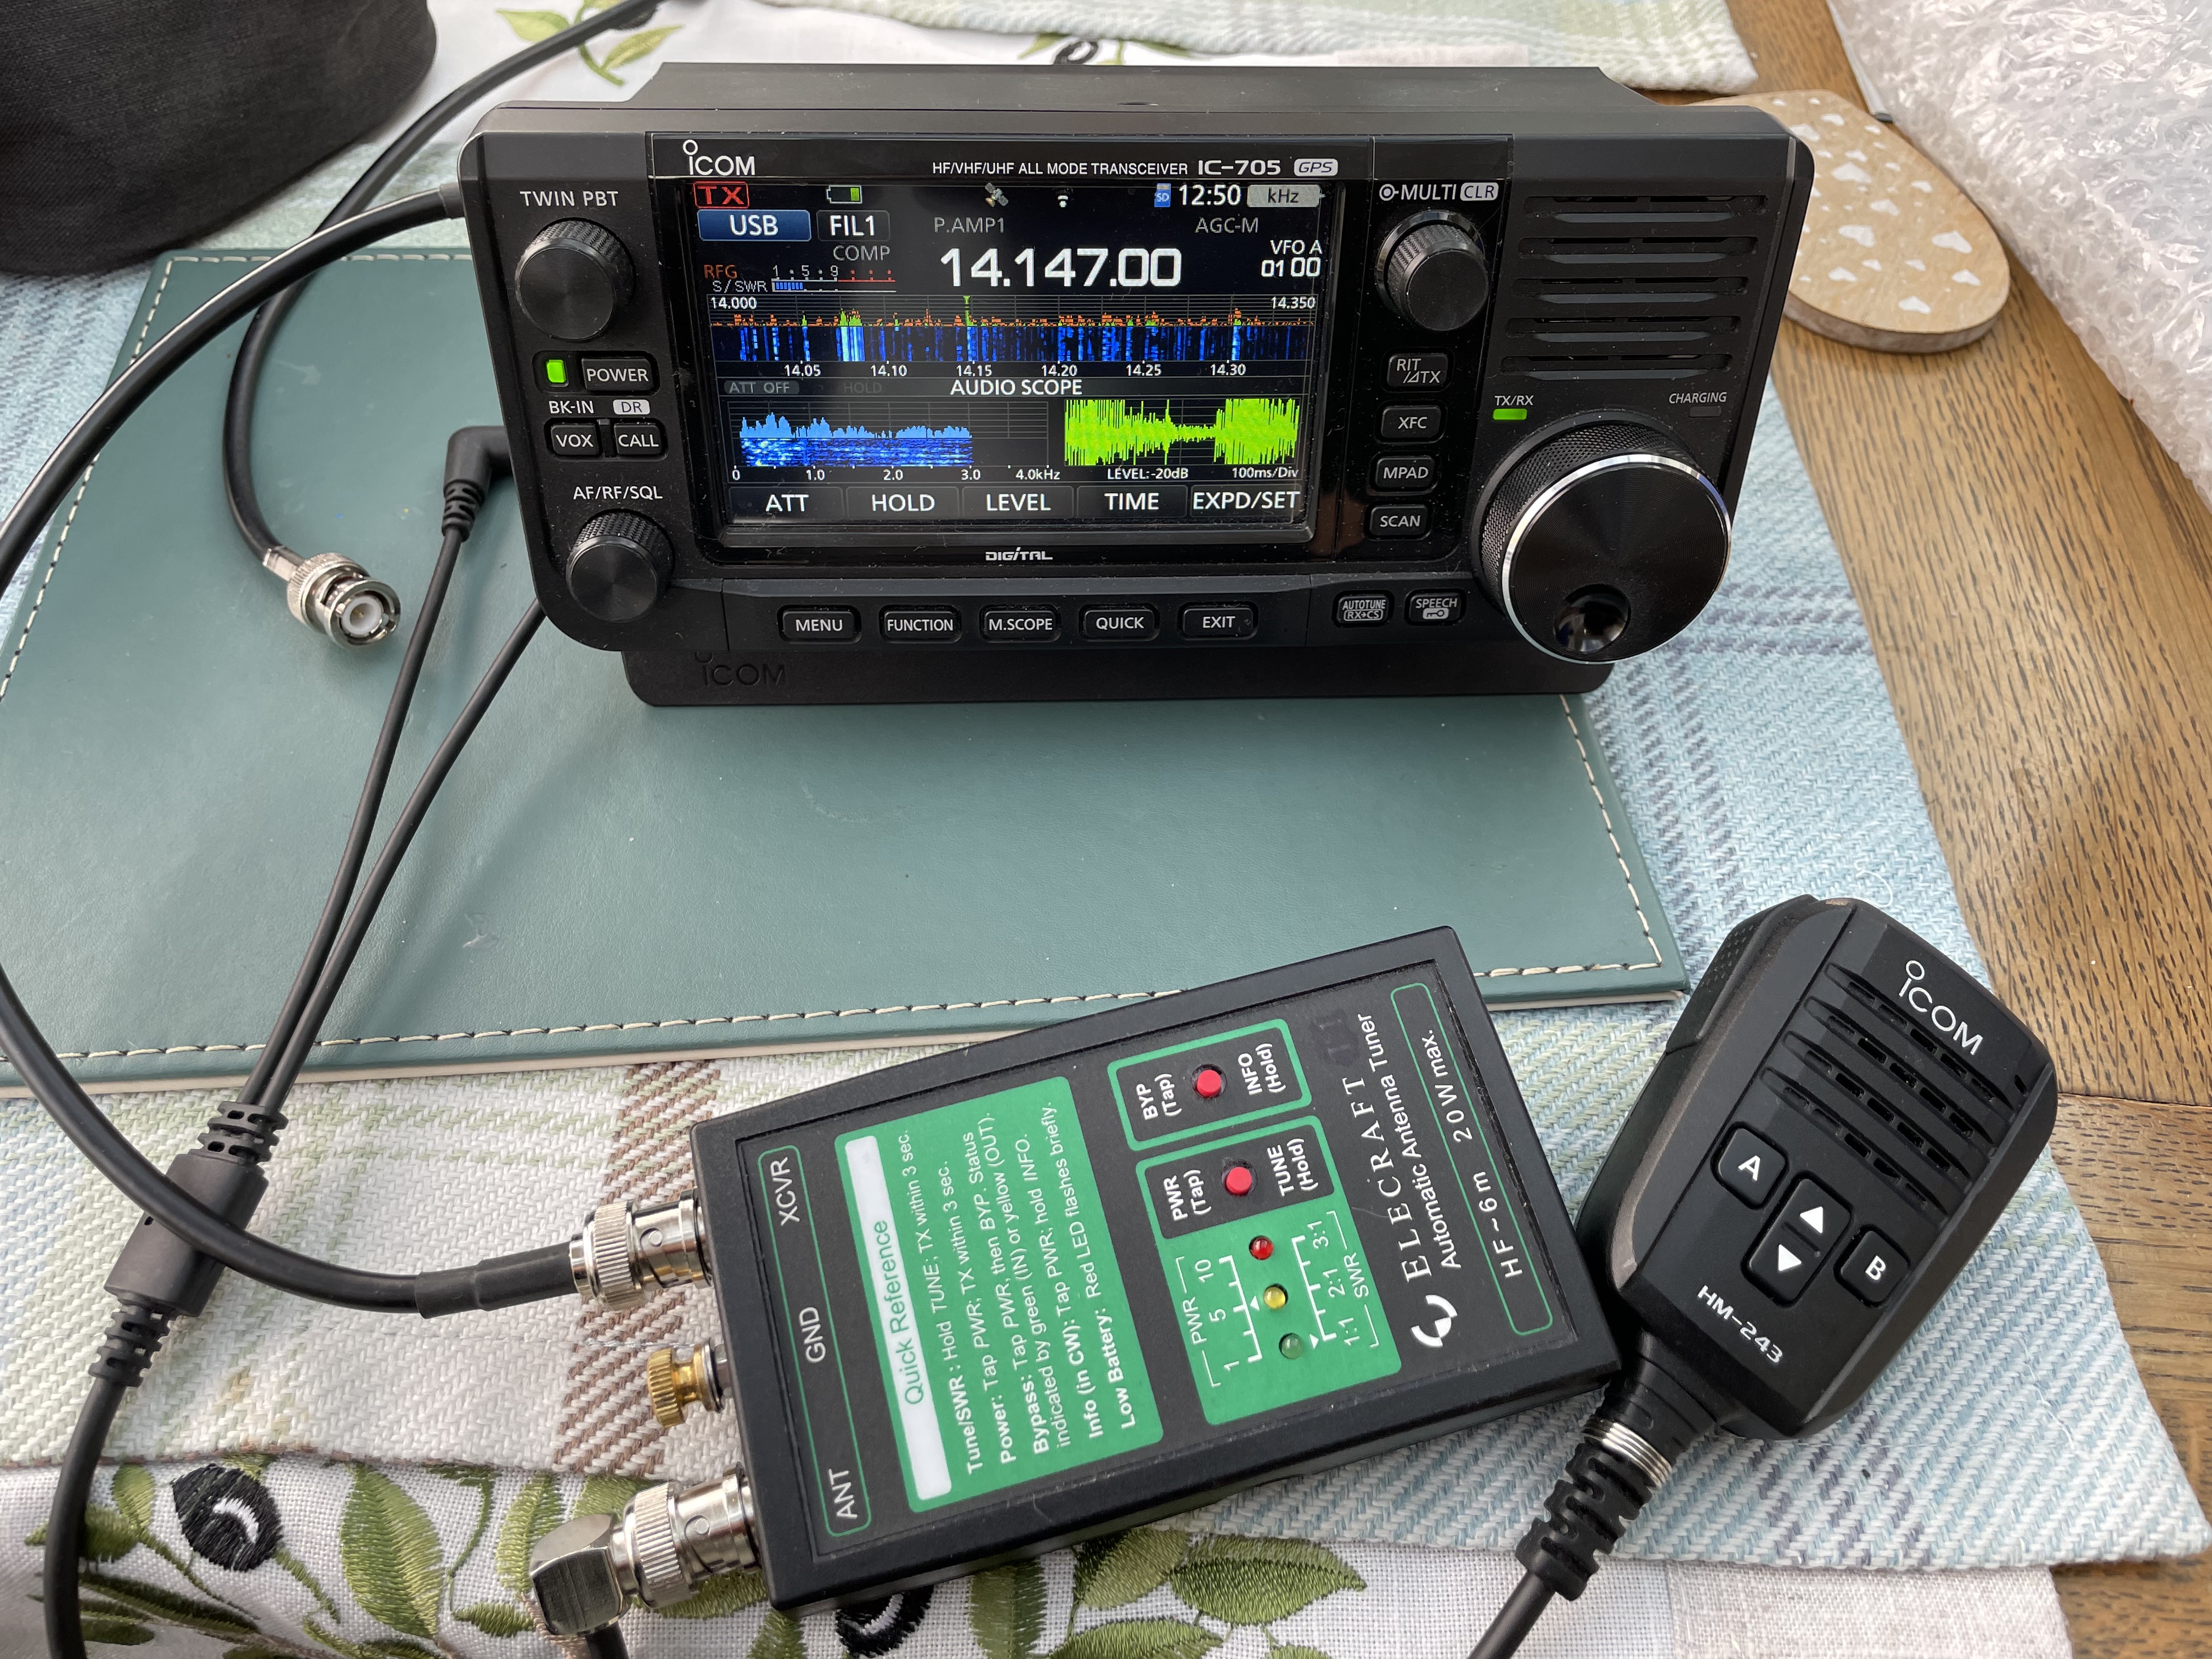
In the absence of an analyser, I decided to go straight to the antenna test with each leg of the dipole extended to 5.28M.  I fitted a 1:1 balun to prevent the coax becoming an RF radiator, connected the ATU and jumped onto the 20M band.

I could see straight away from the busy waterfall that the antenna was pulling in plenty of signals on this band. It was quite busy and so I attempted to make some contacts with my IC-705 on its maximum 5W output (internal battery).


My first QSO was with Ricardo (LX2AM) in Luxembourg. He was struggling to hear me but was very patient and gave me a 13 signal report. Not the start I was hoping for. Soon after though, I switched to the 17M band and got a 55 from Antonio (IU6QLJ) in Italy.

After that, I got another three contacts on 20M (DL0AH, DH1TT, F4ELA) before switching to 15M to get a 59 from II2WRTC.

Then I moved to 40M and made contact with G3SIG before finally speaking with SP8ALT on 10M.


The rain and wind decided to spoil the fun, so I quickly dismantled the antenna and called it a day. I was quite pleased with this initial test and it was good to make contact on 5 bands. I was surprised to see that the antenna also tuned up on the 6M band (50.300MHz SSB) but there was no one around to answer my CQ calls.

The thing to bear in mind is that this first test was done in a poor location and I very much look forward to trying it out from a hillside or seaside, which is where it would naturally be used.

I also need to look at MAYBE buying or making a loading coil because some bands just couldn’t be tuned - not even with the mighty Elecraft T1 😮. The only trouble with introducing a loading coil is that I’d need two - one for each whip - and I’m not sure I want to go that far. If it gets too complicated, I’d probably just use my SotaBeams Linked Dipole.

The attraction of the V-Antenna is that it has a relatively small footprint which makes it handy to use in certain places.

Ah well, we’ll see what happens in the next test, where I’ll be at a much better take-off location.


Until then, best 73, Tom, M7MCQ.

UPDATE <<< 5th FEB 2023
I altered the mounting plate (again). This time I used a UPVC Chopping Board! It’s light, strong and simple to work with. It also spreads the support-posts further apart from each other which helps.

Today I decided to see if I could get it to work on 4M, so I started by extending each leg to around 1100mm long and connected it to my NanoVNA. I guess I got lucky because the SWR was 1.12:1

With a little more fiddling, I got a perfect match and so I attached my Wouxun KG-UV8G and put out a call. Immediately, my friend Bill (G4CFP) returned to the CQ. He lives in the same town as me, so it was no test of reach, lol 😂 but at least it proved it worked. He said it sounded perfect, so that’s a good start.

Just need to spend a day on top of Winter Hill with it.


G4CFP


UPDATE <<< 7th FEB 2023
I mentioned that the whips were cheap and cheerful at £24 for the pair, well it turns out the quality was not good. One of the end sections completely came out and I suspect that the others will be equally vulnerable. Once this happens, there's no going back because they become very loose - to the point where you would end up taping them to hold them in place.

Obviously that's not good, so I've sent off for a new pair from ML&S.

Buy cheap, buy twice!! 😳


Tuesday, 10 January 2023

WHY JOIN A CLUB?

999999

IS IT WORTH JOINING
YOUR LOCAL RADIO CLUB?


Some hams operate alone and have no desire to get involved with other operators on a face to face basis and that's obviously their choice, but there's a lot to be said for joining a local radio-club and that's what I want to look at here.  Through different hobbies I've learned that there are many benefits to joining a club and over the years I've greatly enjoyed my membership of the local Biker Club, Art Club, Photography Club, and more recently Radio Club.

Clubs offer different things to different people. Beginners who are looking to get into the hobby can gain access to a wealth of knowledge and advice at their local club, including help with training. Radio equipment and antennas are often readily accessible too. 

Clubs offer members plenty of other learning opportunities in the form of Guest Speakers and Demonstrations and not all of these need to be outsiders - sometimes it's equally valuable and entertaining to have a Club Member do a Show & Tell on a subject that he's particularly passionate about such as 'Operating Remotely' or 'Introduction To C4FM' or 'DIY Antennas', etc. There's always something new to learn in this great hobby and at the Club, there's always someone with valuable information to impart.

It's worth pointing out that some clubs might be focused more on Social Meets rather than Radio Activities, so make sure that you choose the right one for you. Or join both! 😊


Most clubs arrange activity events throughout the year and these are varied to suit the many different interests of the members. Some will be interested in a QRP Field Day while others might prefer a day-trip to Jodrell Bank or Hack Green. Everyone's catered for and everyone's free to suggest something. 


As a group, club-members take part in all sorts of little projects like...

  • Building a Repeater
  • Operating Remotely
  • DIY Antennas
  • Learning To Solder
  • Building Electronic Kits
  • Erecting Antennas
  • Planning Permissions
  • Entering DX Competitions
  • Working with Linears
  • Working QRP
  • SOTA & POTA 
  • Exploring Digital
  • Using VNAs
  • Using Morse Code
  • QSO with a Space Station
  • Setting up DSTAR, C4FM, DMR
  • Setting up Logging Software
  • Raspberry Pi for Amateur Radio
  • and many, many more!


More than anything though,
Radio Clubs exist to bring together like-minded people and to create an environment in which they can relax, enjoy, study and learn. In a busy world full of work commitments, stress and worry, your visit to the Club can mean a very welcome break!

So why not try your local Club?
It costs nothing for your first few visits and ongoing membership costs are minimal. You'll almost certainly gain from your membership and although you may not think it, you may well end up helping others out - we've all got something to learn and something to teach. Take a friend along with you!

_______________________________
My Local Clubs


Ladybridge,
BOLTON,
BL3 4RZ.


_______________________________


Hollins Social Club
Off Hollins Lane
Bury
BL9 8BA


Miners Welfare Club
Meanley Road
Gin Pit Village
Astley
M29 7DW.